

Tube amplifiers are especially known to be the best friends of guitar music we all love. It amplifies the iconic tunes and riffs of many of our favorite genres. But of course, such devices are prone to wear and tear. Eventually, the output of these tube amps would become distorted, unclear, and unenjoyable after so much use.
Problems in sound output can also be encountered when the tube amp bias too high (running hot, harsh, and inaccurate sound) or set too low (bias-colded, thin, and less lively sound).
Fortunately, knowing how to bias tube amp with multimeter lets us correct the sound output and increase the lifespan of our tube amplifiers.
Table of Contents
- Types of Tube Amp Bias
- Step-by-Step to Bias Tube Amp With Multimeter (Without Bias Probe)
- What to prepare
- Step 1: Warm up the amplifier
- Step 2.1: If bias test point and bias trim pot are accessible from outside the amp
- Step 3.1: Adjust bias trim pot according to the recommended values.
- Step 2.2: If bias test point and bias trim pot are not accessible from outside the amp
- Step 3.2 Adjust bias trim pot from the internal circuitry
- Step-by-step to Bias Tube Amp With Bias Probe and Tube Bias Calculator
- FAQs
- Conclusion
Types of Tube Amp Bias
However, it is important to consider first that there are different types of bias tube amplifiers.
With the likes of self biasing tube amps, you wouldn’t need to adjust bias tube amp of this type. Just replace the worn-out power tubes with matching ones, and you can resume playing your music.
But in this guide, we will be looking at an adjustable fixed-bias amplifier. This type is defined by an internal or external trim pot or potentiometer that enables you to bias an amp with a multimeter with basic knowledge.
Step-by-Step to Bias Tube Amp With Multimeter (Without Bias Probe)
Here are the few things you need to take note of as you bias tube amp without bias probe:
What to prepare
- Multimeter
- Alligator clips
- Screwdriver
- Speaker
Step 1: Warm up the amplifier
Turn the amplifier on and wait for around 30 minutes or more – this warms up the amp to ensure accurate reading later on. To avoid improper reading and further risk of damage, make sure that a ‘load’ is plugged into the tube amp. This ‘load’ can be in the form of usual speakers.
From here, steps 2 and 3 will vary depending on your amplifier’s setup. Follow steps 2.1 and 3.1 if your bias test points and bias trim pot are accessible outside the amp.
Otherwise, steps 2.2 and 3.2 will show you the additional steps you need to perform inside the circuitry if the amplifier only has an internal potentiometer.
Step 2.1: If bias test point and bias trim pot are accessible from outside the amp
From the back of the amplifier, locate the test points – they are usually labeled as V1, V2, and so on.
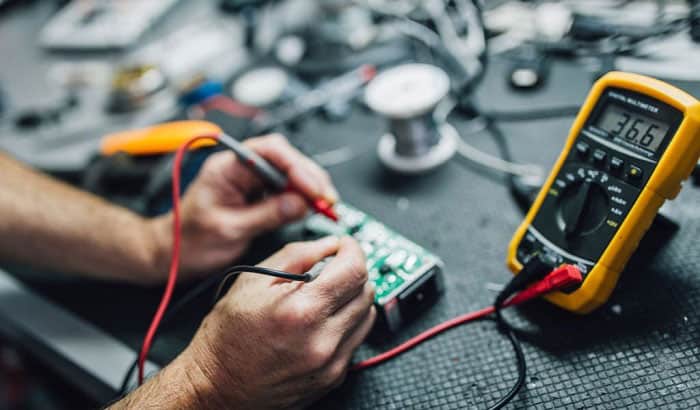
Your multimeter should be set to DCV less than 200m. After this, insert its red and black probes into the appropriate test points and take note of the current reading.
Step 3.1: Adjust bias trim pot according to the recommended values.
Pinpoint the corresponding bias trim or knob also labeled as V1, V2, etc. – you should find this on top of the amplifier.
Using your screwdriver, slightly turn the bias trim until the reading matches the manufacturer’s recommendation. Adjust the next knob once done.
As you move to the next tube, the previously adjusted ones may have the values fluctuate by 10-20%. It is better to check and adjust accordingly until all are set.
Step 2.2: If bias test point and bias trim pot are not accessible from outside the amp
Going back, if the bias test point and bias trim pot are not accessible outside, you would need to access them inside the amplifier’s circuitry.
Unscrew the amp’s cover to expose its chassis and internal electronics. Look for the bias test point (near the tubes to be tested, with label) and the bias trim pot (black circle, with label).
Step 3.2 Adjust bias trim pot from the internal circuitry
The process is quite similar to step 3.1, but you will be adjusting the tubes from inside the amp.
Ground the connection by attaching the negative lead to the amp’s chassis. The positive lead will be clipped to the bias test point identified earlier. Take note of the reading.
Make slight turns on the potentiometer until the bias is set to the recommended value. Do this on all of the tubes. Similarly, check and adjust accordingly for changes that may occur.
After finishing these simple steps, you have succeeded in biasing and testing tubes with a multimeter. Enjoy your efficiently running and brand new-sounding device.
Step-by-step to Bias Tube Amp With Bias Probe and Tube Bias Calculator
Biasing a tube amp can also be done using a bias probe and tube bias calculator alongside the multimeter. To do this, here’s a quick overview of the steps and tools needed to bias a marshall tube amp:
What to prepare
The needed tube biasing tools are as follows:
- Matching set of tubes
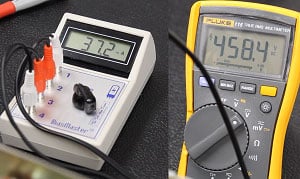
- Bias meter
- Bias probes
- Multimeter
- Alligator clips
- Screwdrivers
- Speaker and speaker cable
Steps to bias tube amp with bias probe:
- Turn off your tube amplifier and let it ‘cool’ for at least 30 minutes. Its capacitors can still have fatal voltages even when unplugged. Proceed with extreme caution.
- Use a screwdriver to remove the cover of the amplifier. Remove the amp’s internal circuitry from its housing.
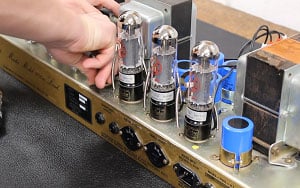
- Carefully remove the old, worn out tubes from the amplifier. Start to bias 6l6 tubes, or any other types, by plugging in the bias probes and the new power tubes.
- Connect the probes to the bias meter first to be able to monitor the bias current easily.
- You’ll also need to connect your amp to multimeter using the plate of one of the power tubes. Refer to your amplifier’s schematic or the tube data sheet to ensure proper connections.
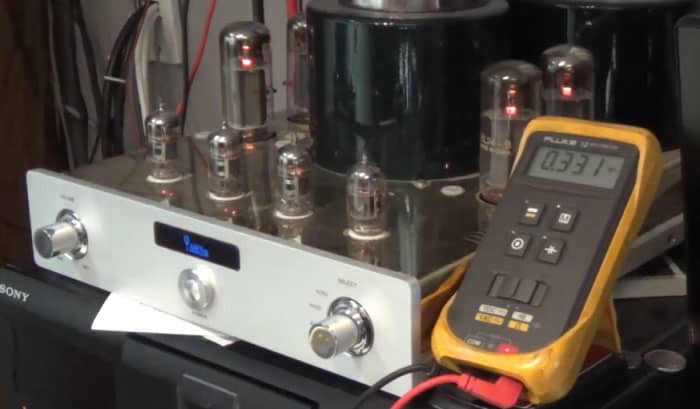
- Clip the negative probe of the multimeter to the ground. You just need to clip the black lead to the amp’s chassis. Then, turn your multimeter on and set it to DC Voltage.
- Connect the amplifier to the ‘load’ or the speaker then plug in and turn on your amp. Put the amplifier on standby mode to let the new tubes warm up.
- Set tube amplifiers by turning off standby mode after 2 minutes. Take note of the voltage displayed in the multimeter.
- Search for a biasing tube amplifier calculator online. You would need to input your power tube’s details and the voltage you got earlier.
- Wait for it to calculate your bias point. You will probably get multiple values – ranging from 60% to 110% bias point. Choose the standard value at 70% and take note.
- Locate the bias trim pot, or the potentiometer. Carefully tune this using a screwdriver until the reading in the bias meter matches the bias point calculated earlier.
You may now switch off the power, disconnect the multimeter and bias meter, remove the bias probes and plug the new tubes directly, and return the internal circuitry inside.
This is another way to adjust bias on the amplifier successfully. Sit back and enjoy those amazing guitar riffs without worrying much about your amp’s lifespan.
Read next:
FAQs
What is amp bias?
This is the process of adjusting the potentiometer to match either the manufacturer-recommended value or a calculated bias point.
Biasing ensures that the power tubes run efficiently at the optimum temperature while giving off the best sound output.
When should I check the bias?
Check every 3-6 months, depending on usage. But the golden rule is every time you change your amp’s tubes; you’ll need to bias it.
How do you measure a tube amp bias?
Bias points can be calculated using an online tube bias calculator. You would check amplifier with a multimeter and bias probe in this method.
When testing tubes with a multimeter alone, bias is measured and compared to the manufacturer’s recommendation, as discussed step by step above.
What happens if I don’t bias my tube amp
Not rebiasing an amp means you risk permanent damage to your amplifier and potential injuries to yourself. And, of course, you don’t get the output quality you paid for.
If not done correctly, the valves may run too cold or too hot – either of which will give sub-optimal sound outputs.
Bias your tube amp the correct way to ensure you get the most out of your device – great sound and long tube life.
Conclusion
Tube bias affect tone heavily; that is why the general rule is if it sounds bad, replace and re-bias it. There’s no other way around a good sounding tube amplifier.
By learning how to bias tube amp with multimeter, you won’t have to worry about its lifespan and you can play all your favorite and iconic guitar music with no regrets.

I am Edwin Jones, in charge of designing content for Galvinpower. I aspire to use my experiences in marketing to create reliable and necessary information to help our readers. It has been fun to work with Andrew and apply his incredible knowledge to our content.