
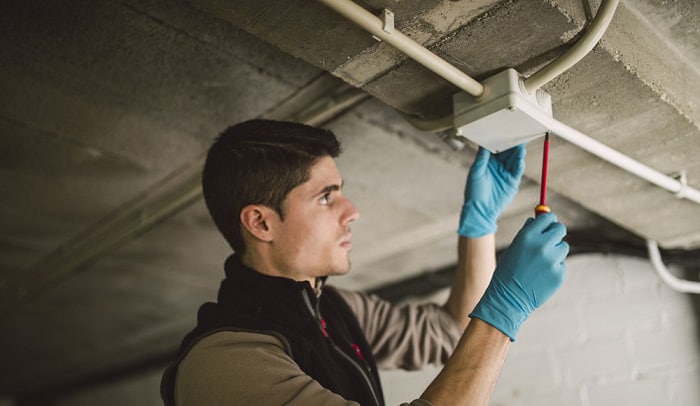
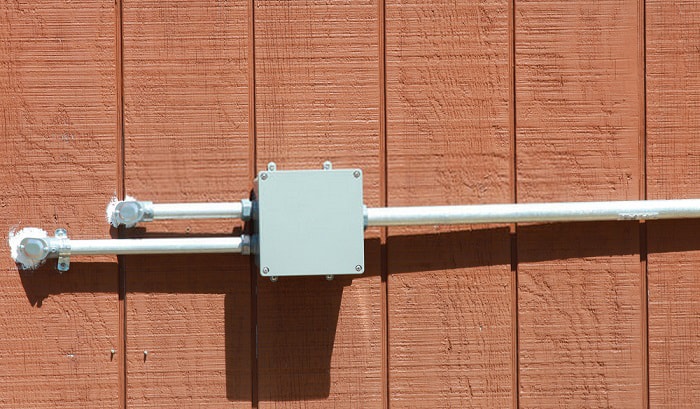
Did you install electrical boxes for a new set of circuit series? It’s a must to keep wirings around the house safe with a PVC electrical conduit connecting to an electrical box— this type of enclosure is necessary for protecting wiring splices.
Moreover, you as a homeowner must comply with the National Electrical Code (NEC) rules and regulations, so it’s best to learn how to connect PVC conduit to an electrical box.
Cut the pipe, apply PVC cement, and insert it into the electrical box; just as easy as that. But always keep in mind to let your electrician inspect your work afterward.
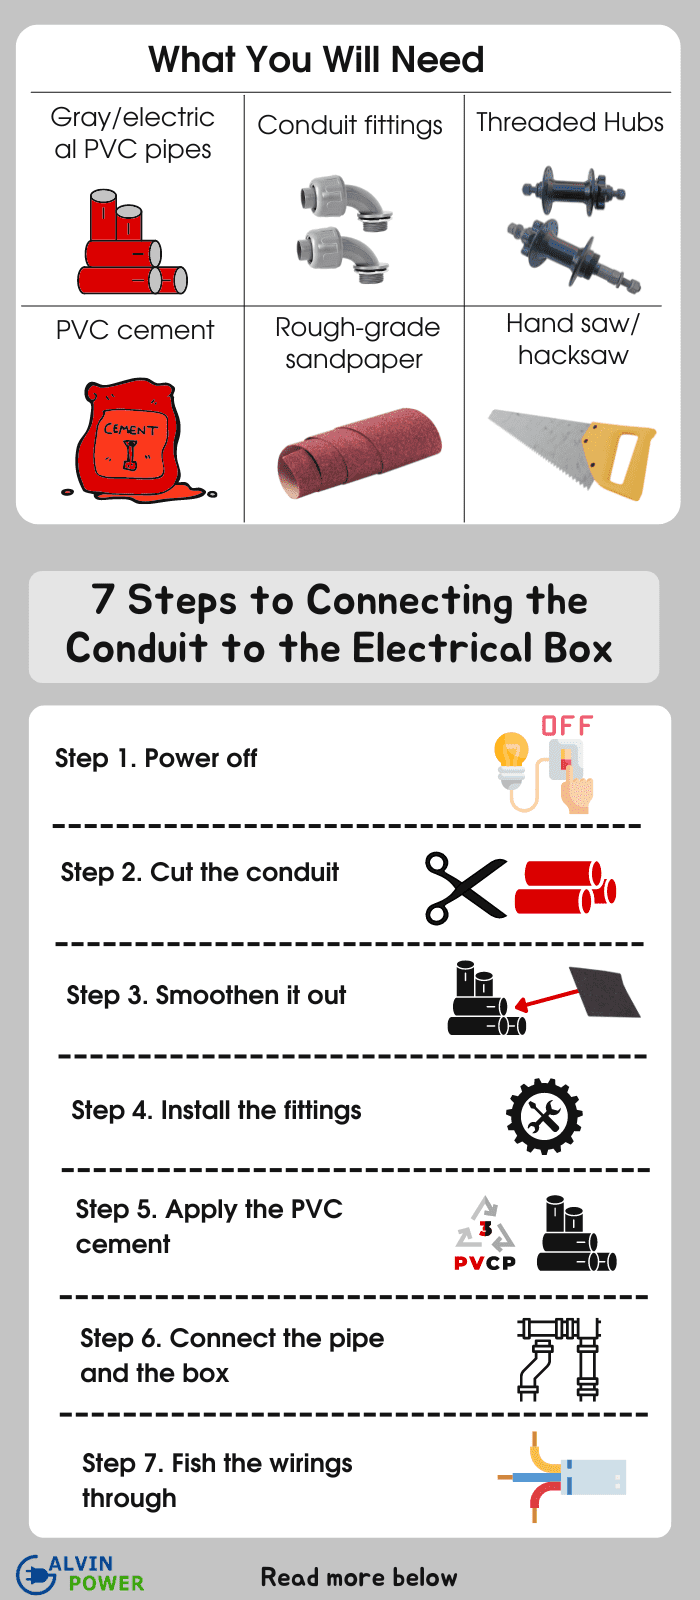
Table of Contents
Steps to Connecting the Conduit to the Electrical Box
What You Will Need
Before starting this project, you’ll need to prepare a few essentials. First and foremost, you’ll be working with electricity, so make sure you have the proper PPE, like insulated gloves and boots. Then, proceed to get these materials.
1. Gray/electrical PVC pipes

This type of conduit pipe is the best to handle electricity due to its ability to withstand harsh weather conditions, especially extreme heat. There are different colors of PVC/CPVC conduits for industrial use.
There’s white for plumbing and black for handling hot water. However, take note that grey PVC pipes are specific for electrical wirings and the most heat-proof among the three.
There are two types of gray PVC conduits, Schedule 40 and Schedule 80. Schedule 40 PVC has a larger diameter than Schedule 80 for pulling wirings more easily, but its shell is thinner. On the other hand, Schedule 80 PVCs are thicker for more wiring protection, but it has a tighter space inside.
Either of the two works great for electrical usage, although Schedule 80 is better for outdoor junction box installation and areas where people frequent. On the flip side, Schedule 40 is best for secluded areas. So it’s better to have them both if you’re planning to run a significant length of electrical conduits around the house.
2. Conduit fittings
Like PVC pipes, conduit fittings are necessary to ensure that your wirings are safe from elements like dirt and moisture. You can use them as a connector for conduit-to-conduit or conduit-to-box. There are a variety of sizes and shapes for different pipe situations or personal preferences.
There are nine types of fittings. Each fitting has its own purpose, but metal locknuts and plastic bushings are enough for connecting PVC conduit to electrical boxes with built-in connectors.
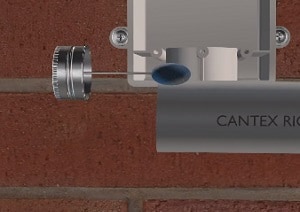
3. Threaded Hubs
Suppose your metal electrical boxes don’t have factory-threaded connectors available. In that case, you’ll need to accompany them with pairs of threaded hubs to affix your PVC conduits into the holes of the box. This tool will serve as a sealant between the two connections.
You can use either metal hubs, plastic hubs, or mixed as long as the plastic won’t crack and the locknuts and bushings keep everything in place. Also, double-check the diameter of your PVC to see it sits perfectly into the slot of your connector. Otherwise, the PVC cement would be useless, and dirt/water particles could still get inside.
4. PVC cement
This solution’s purpose is to attach the plastic electrical conduit securely into the fittings. It is available as a bottle with a cap and an applicator sponge attached, and just by dabbing a small amount, it immediately provides airtight and watertight security.
You can purchase the typical type—a small can for applying to conduits less than three inches in diameter. If your pipe is bigger, buy a large can with a larger applicator pad. Avoid universal solvent types of cement too; only get the can of glue designed specifically for PVC.
5. Rough-grade sandpaper
Rough-grade sandpaper is the best I can recommend for deburring the edges of a cut PVC conduit. You’ll need this to smoothen out the rough patches that can potentially harm your wirings in the long run.
But if sandpaper is not available, you can always use a sharp knife or a cutter to remove the jagged areas.
6. Hand saw/ hacksaw

PVC conduits aren’t that challenging to cut. You can do this with minimal effort using a hand saw or a small blade, and it will do the job just fine.
However, if you want to work faster and with fewer ridges after cutting, a hack saw or a circular saw can make the surface smooth quickly. Either way, both can do it. It’s a matter of personal preference, but the latter choice is preferable if you’re on a deadline.
With all the items you’ve gathered from the hardware shop, gear yourself up and get to work with this PVC electrical conduit installation guide.
Step 1. Power off
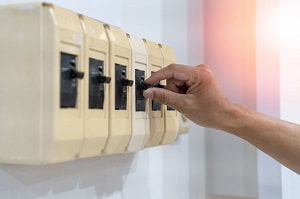
First, the number one safety protocol before working on electrical maintenance is switching off the main breaker. With this step, you can freely move in your workspace without the risk of touching a live wire. Later on, you’ll need full force to pull wirings from a tight tube, so going powerless is the most efficient and safe manner to do this.
Step 2. Cut the conduit

While cutting your tubes, make sure they match the corners and path of your wiring system. The edges must fit through the fittings when connecting PVC conduit to metal box.
To do this precisely, you can mark a straight line where you’re supposed to cut it, then use a clamp to grip your PVC as you chop it down. However, if you’re in a rush, you can try more straightforward methods like using a PVC cutter.
Step 3. Smoothen it out
Now, of course, a fresh-cut PVC will always have rough edges of plastic hanging inside or outside of the pipe. Always deburr the ends of your PVC with the help of rough-grade sandpaper or a knife. These patches of plastic can be sharp to touch at times, and with that, they can potentially damage the wiring insulations if you disregard them.
Step 4. Install the fittings
If your electrical box has an in-built fitting, you can skip this part. Otherwise, before attaching the conduit to the junction box, prepare the threaded hubs, bushings, and locknuts first. Insert the proper size of PVC fitting in the box hole and use the locknut and bushing to keep it watertight. After this, you can now glue them up.
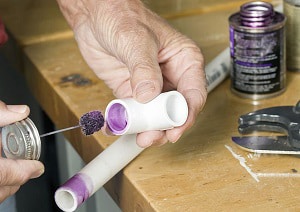
Step 5. Apply the PVC cement
First of all, your electrical PVC doesn’t need a primer. Your hardware retailer has glue or cement specifically for a conduit-to-fittings connection. When you do this procedure, wear a glove as you dab a small cement portion on the tip of the pipe. Do the same step inside the electrical box’s fitting, but don’t try to overfill it.
Never try to dry-fit your PVCs and their fitting for measuring purposes. It doesn’t work like a Lego or a puzzle that you can slip in and out with no problem. Always smear the PVC cement first.
Step 6. Connect the pipe and the box
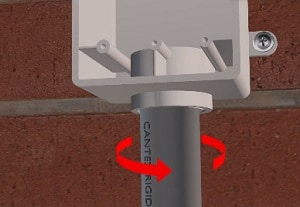
Once that’s all settled, connect your outdoor electrical conduit inside the fittings of the box. Remember to install one box at a time and never do multiple simultaneously, or you’ll struggle trying to run all your conduits. The trick is to connect your PVCs into one box at a time while doing a conduit run.
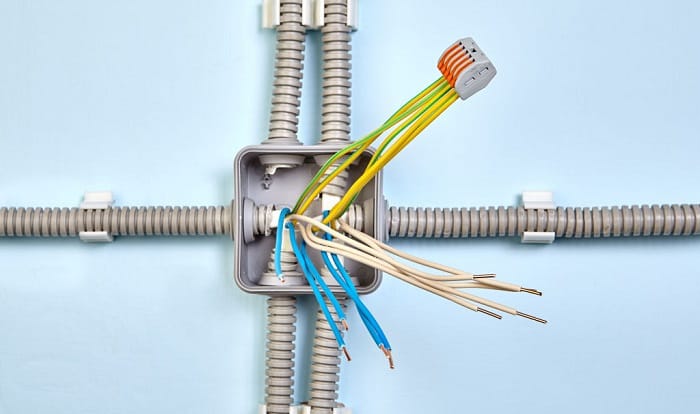
Step 7. Fish the wirings through
Wait for 15 minutes to dry the glue and a few hours to cure, depending on the temperature, when installing PVC conduit outside the house. Then, fish your wirings through the pipes going into the junction box. You can use fish tape or what they call an electrician’s snake to draw the wire through the conduit.
Conclusion
So that’s it! Remember that the most crucial part of learning how to connect PVC conduit to an electrical box is deburring the rough edges after cutting the pipe. Many people forget to do this part, and once they fit the tube inside the fittings, there are still sharp plastic remains that can eventually damage circuits.
Did this tutorial work well for your PVC installation? In the comment section below, you can tell what I missed or share it with your friends if you find it helpful.

I am Edwin Jones, in charge of designing content for Galvinpower. I aspire to use my experiences in marketing to create reliable and necessary information to help our readers. It has been fun to work with Andrew and apply his incredible knowledge to our content.