
Installing a subpanel is a safe way to provide electricity to other parts of a home or building. Additional subpanels allow more circuits to be connected to desired locations like in detached garage in cases where a tandem circuit breaker is not appropriate.
Also, they make switching the power off easier during an emergency in the detached locations without affecting the main panel. Installing a subpanel is best handled by a professional electrician, but if you’re curious how it’s done, here is a brief overview of how to install a subpanel breaker box.
Table of Contents
What to Prepare
1. Materials
- Panel set with “main lugs only”
- Appropriate feeder wire
- White electrical tape (to mark the neutral wire if using wires thicker than 6-gauge)
- Bare copper wire for grounding
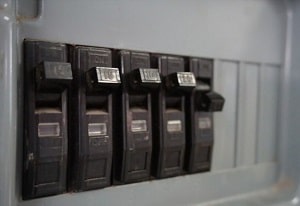
- Appropriate breaker
- Electrical conduit and adhesive
- Mounting screws (if panel set has no mounting screws included)
- Neutral lug kit
2. Equipment
- Screwdriver
- Cable cutter
- Pliers
- Strippers
- Independent light source
- Hammer
- Safety gear (like appropriate gloves, etc)
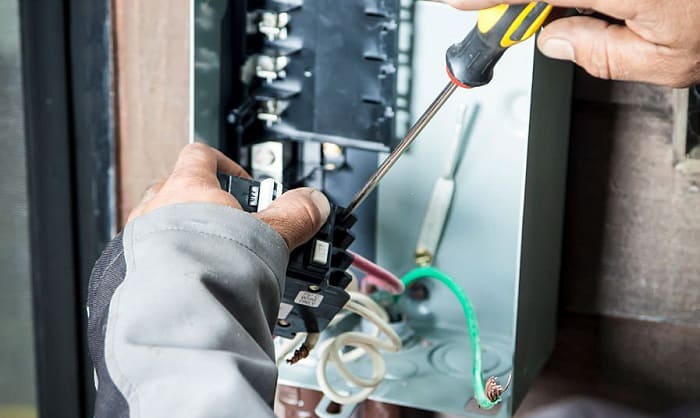
Step 1: Mount the panel
- Identify the location where you’re adding a second breaker box. Check the code requirements like the National Electric Code in the US, coined NFPA 70 or NEC, Article 110.26.
- Plan how the wiring (the ground, neutral and hot wires) will be connected when you add a subpanel to a full breaker box.
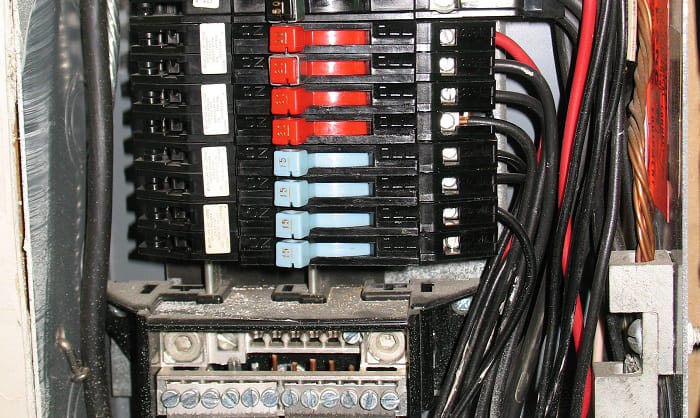
- Check the wiring diagram of the main panel and identify available slots in your panel that can be used to connect the sub panel or connections that need to be moved.
- Wear the safety gear, turn on your independent light source, and turn off the main panel.
- Remove the appropriate knockout slugs from the main panel and attach the electrical conduits using the adhesive from the main panel to the subpanel.
- Turn on the main panel until the adhesive in the metal conduits dry that requires panels or subpanels be 2.0 m (~6.5 ft) from the floor or platform and with minimum clearances of 900 mm (~3ft) around the subpanel.
- When the location of the subpanel has been decided, mount the subpanel with the mounting screws included in the panel set.
- Then, remove the knockout slugs that fit your electrical conduit.
Step 2: Plan the wiring and attach the electrical conduits
- Plan how the wiring (the ground, neutral and hot wires) will be connected when you add a subpanel to a full breaker box.
- Check the wiring diagram of the main panel and identify available slots in your panel that can be used to connect the subpanel or connections that need to be moved.
- Wear the safety gear, turn on your independent light source, and turn off the main panel.
- Remove the appropriate knockout slugs from the main panel and attach the electrical conduits using the adhesive from the main panel to the subpanel.
- Turn on the main panel until the adhesive in the metal conduits dry.
Step 3: Connect the main panel and subpanel wires
When you wire a subpanel, wear the safety gear, turn on your independent light source, and turn off the main panel.
Also, remember that the line connected to the main grid is still live even if the main panel is off, so be cautious.
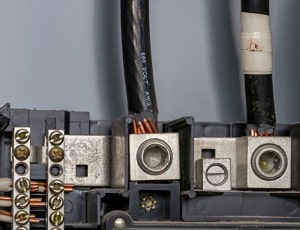
- Using the bare copper wire as the ground wire, route the ground wire from the subpanel to the main panel through the conduit.
- Connect the ground wire to the grounding pins in the subpanel and to the appropriate terminal in the main panel.
- Using the feeder line, again route the ground wire from the subpanel to the main panel through the conduit and connect the feeder line to the terminals in the subpanel.
- On the main panel side, connect the feeder line to the appropriate breaker and attach the breaker to the main panel.
- For the neutral wire, route the wire into the conduit and connect the neutral wire into the neutral bus of the main panel using a neutral lug kit.
- Connect the neutral wire to the neutral bus of the subpanel.
Always check your subpanel wiring when adding a subpanel. If everything is in place, turn on the main panel.
Helpful tips:
- Completely remove the wire sheath to ensure that the cables will be snug when attached to terminals. Use cable cutters, pliers, and strippers for easy stripping.
- Always use the correct feeder cables prescribed by NFPA 70.
If using a 6-gauge or thinner wire, the wire may be using a 4-wire color scheme with black and red for feeder lines, white for neutral lines, and bare copper for ground wires.
If not, mark the wires appropriately, such as marking the neutral wire with white tape.
Conclusion
Adding a subpanel may be an additional safety feature for installing circuits from your existing main panel to your detached locations.
The safety and convenience it gives during emergencies make them a worthwhile venture.
Installing a separate breaker box may be an interesting project. But always remember to know the requirements for your new installation, acquire all the proper materials and equipment, and consult a professional on how to install a subpanel breaker box.
Related posts:

I am Edwin Jones, in charge of designing content for Galvinpower. I aspire to use my experiences in marketing to create reliable and necessary information to help our readers. It has been fun to work with Andrew and apply his incredible knowledge to our content.