
Making an extension cord is a very straightforward process that anyone can do. However, when fabricating your own cable, especially for high-power devices, you should be more specific with your materials.
Utilizing thin wires rated only for 110/120 volts may be insufficient for high-powered devices, posing an electrical hazard. In this instance, if you’re looking for an easy guide on how to make a 220v extension cord, you’ve come to the right place. Read this article all the way through.
Table of Contents
Step-by-step to Make a 220V Extension Cord
Custom-made 220v extension cords, also known as 220 drop cord, are tools primarily crafted for large electrical devices such as table saws and other power tools. Generally, these extension cords use large wire sizes to carry a large amount of current.
Therefore, for this guide, we’ll use a 10/3 gauge SOOW wire to make a 30 amp 220v extension cord. This type is flexible and heavy-duty enough, which is perfect for our application. Do not use a Romex wire to wire a 220v extension cord, as it contains a solid strand that is only good for permanent applications.
Now, to make your 220v or 240v extension cord, here are the tools and the straightforward guide you need to follow.
What To Prepare
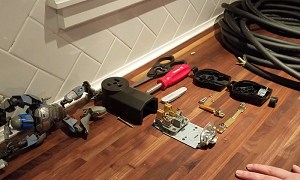
- NEMA 30-amp plug and receptacle
- 10/3 gauge SOOW wire
- Screwdriver
- Wire stripper
- Wire cutter
- Cutting knife
- Multimeter for testing the extension cord
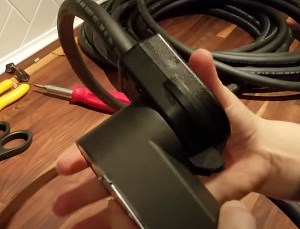
Step 1. Strip One End of the Wire
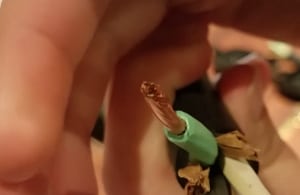
To be able to start making your extension cord, you need to remove the cover of the cord. First, get the extension cord plug and disassemble it. In this process, you can precisely determine where the wire cover needs to be cut.
Using your cutting knife, expose the wires inside the 220v extension cable. Then, remove the other stuff, such as the cardboard insulation between the wires.
Lastly, using your stripper, take off about a quarter inch of the insulation so the cord strands are ready to attach to the plug terminals.
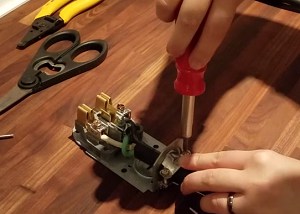
Step 2. Connect the Wire to the Plug
Before connecting the wires to each terminal, you need to insert the collar or ring that will give the clamp a perfect grip on the cord. You can also remove all prongs to make it easy to attach the wire to each terminal.
Then, twist the wires before inserting them to prevent messy strands that may cause a short circuit.
Connect the green wire to the ground prong or the one with a “U” shape. For the two hot wires, it does not really matter where you put each of them.
However, for easy identification of the plug ends the connection, I highly suggest connecting the black wire to the thinner prong and the white wire to the thicker prong. Make sure both are securely attached and put them back where they should be positioned on the plug casing.
Step 3. Connect the Other End of the Cord to the Outlet
Now, for the outlet part of the extension cord, you should do the same steps you did on the other side. Get the outlet, disassemble it and measure the part where you need to cut the cord cover. Then, remove the cardboard insulation and strip a quarter inch of the wire insulation.
For the wire connections, seeing where the terminals are will also give you an idea of where you should attach each wire. Loosen each terminal and connect the wires.
The green wire will often be in the middle of the outlet. The two hot wires should mirror the connections you did for the plug part. Connect the black wire to a thinner slot terminal and the white to the bigger one.
Attach the clamp, cover it, and you are done.
Step 4. Test Your Work
Once you have done all the steps above on making a 30 amp extension cord, it is good to have a continuity test of the wire connections using a multimeter.
To test the cord, insert the red lead into the volt and resistance (VΩ) jack, black into common, and set the dial to resistance (Ω).
Now, test both of the ground connections and two hot wire connections. If you hear a beep sound each test, it means you correctly joined the wires, and they are now ready to go.
Even though this extension cord is rated for 220v service, you can still use it for a 110 service to power a 220 watt appliance such as an average fridge.
Note: You can follow the same guidelines when making a DIY welder extension cord. However, for a 50 amp 220v service, you can use a 6 gauge wire and NEMA 6 50 plug and receptacle.
This is necessary since a 50 amp 240 volt extension cord is meant for heavier applications such as large welding machines.
FAQs
How Long Can a 220 Volt Extension Cord Be?
Generally, any extension cord, including a 220v extension cord welder, is typically limited to 100ft. OSHA established this law concerning the use of extension cords at any workplace due to the higher risk of voltage drops as cord lengths increase, which can lead to a safety issue.
How Do You Wire a 220 Volt Cord?
Different types of 220v extension cords are used in a 220 amp home panel. Each may require three or four wire connections. For three-wire cables, you can use the above guide, but for four-wire types like extensions for dryer, it is mostly done like this:
The neutral connection of the outlet where you connect the white wire is to the letter “L” shape terminal, the ground is to the semi-circle terminal, and the two hot wires, which are black and red, go to the two vertical slots.
What is the Proper Wire Size for RV Extension Cord?
Generally, you can tell the recommended extension wire size by knowing your RV rating. Typically, a 15 and 30 amp RV has a recommended 10 gauge wire for up to 125v service. However, for large 50 amp RVs, 6 gauge is recommended to supply up to 250v.
Each rating of extension cords may also use a different wire connection. In this case, it is good to find first the appropriate wiring diagram for each RV rating.
Related guide you may be interested in:
4 Simple Steps to Make a 50 Amp RV Extension Cord
Conclusion
Knowing how to make a 220v extension cord will let you save some money from buying a pre-made one. However, some safety factors, including application length, must be considered to prevent electrical hazards.
If you still have trouble creating an extension cord for 220v service, it is highly recommended to just purchase one, whether at Lowe’s or another electronic store. Nevertheless, it would be best if you were careful, especially when choosing cheaper products, since they are usually easy to damage and may cause electrical hazards.

I am Edwin Jones, in charge of designing content for Galvinpower. I aspire to use my experiences in marketing to create reliable and necessary information to help our readers. It has been fun to work with Andrew and apply his incredible knowledge to our content.