
Over time, any extension cord, even heavy duty extension cord, can get damaged. It could be due to improper handling like putting excessive force on the connectors or environmental factors abrading the insulation.
If your cord gets damaged, don’t throw it away. In most cases, you merely need to remove the deteriorated part to continue using it. To know how to replace an extension cord plug, simply follow the instructions below.
Table of Contents
Step-by-step to Replace an Extension Cord Plug
What to prepare
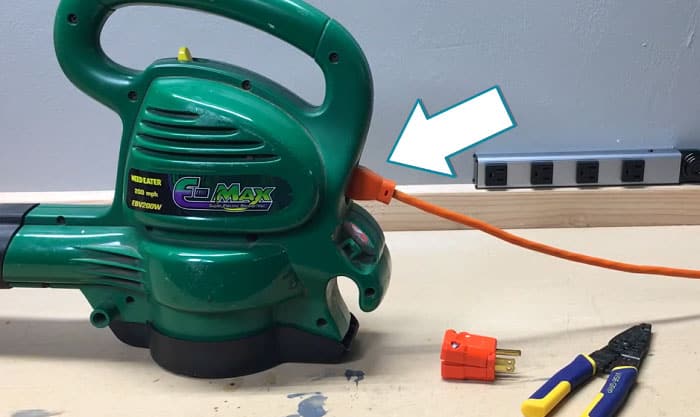
Before we begin, prepare the following for your extension cord repair kit.
- Replacement plug that is rated for your extension cord
- Screwdriver
- Wire Stripper
- Utility knife
- Outlet tester
Step 1. Remove the Damaged Part of the Cord
To replace plug on the cord, start by removing the damaged plug part of the cord. Ensure that it is completely detached to prevent future electrical hazards. After that, you will notice how many wires are inside and the layers of insulation.
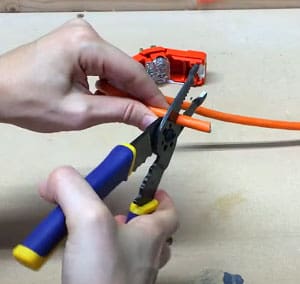
This time, you will need to remove about an inch and ½ of the cord cover to expose the wires inside. You don’t want to damage the whole extension, so follow the next instructions.
Bend while squeezing the cord with one hand. Then, using your other hand, get the cutting knife and gently put pressure on it until you see the wires. At the same time, do the same step on the other side of the cord until you totally remove the cover insulation.
Step 2. Wiring Extension Cord Plug
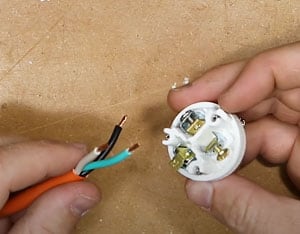
Now that you have removed the cover insulation, you may see the color-coded wires corresponding to its electrical connections. In most cases, if you look at a three-wire extension cords diagram, you will see that black stands for hot, white for neutral, and green for ground.
Now, using your wire stripper, strip about ½ inch of each wire and twist the stranded wires to keep them tidy. Next, to be able to wire the cord to the new plug, you need to disassemble the latter first.
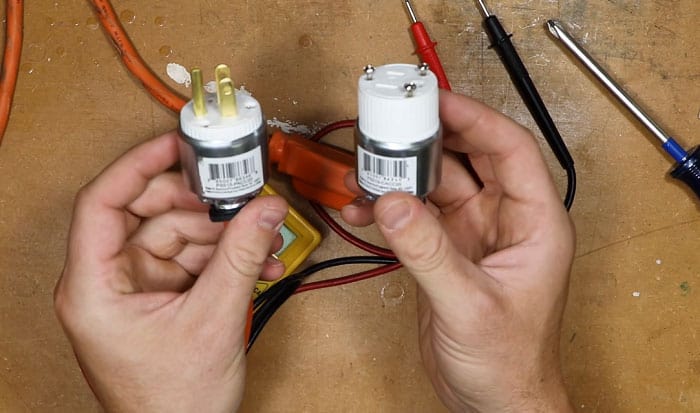
This time, you will also notice that the 3 prong terminals have different colors. Usually, the green terminal is for the ground, silver is for neutral, and brass is for the hot.
Before connecting the wires to the replacement plug for the extension cord, don’t forget to slide them through the backside of the cover. Furthermore, ensure that all wires are properly connected and that there is no excess length on any conductor that could cause a short circuit.
Step 3. Enclose the Extension Cord Plug Replacement
Once you are done connecting the wires, you can enclose them with the plug cover.
This time, you will also notice that there are some corresponding slots on the cover for the terminal screws.
Ensure that the terminals from the cover line up against the correct terminals of the plug prongs. Then, tighten up all the screws to prevent the prongs from falling out of the enclosure.
Lastly, don’t forget to secure the clamp, which provides strain relief for the cord. This way, it will not easily get damaged if you accidentally pull the plug while holding the electrical cord.
Step 4. Test Your Work
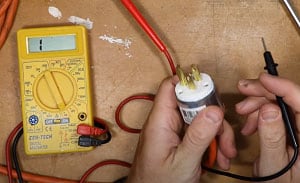
This last part is not necessarily important. However, if you want to ensure that you connect all wires properly into their place and verify the safety of your work, it is best to test it with an inexpensive tool called an outlet tester.
This tool is very straightforward to use. You only need to plug your extension cord into a standard outlet and connect the device to the extension cord. If the tester says the connection is “correct” or safe, you’re good to go.
FAQs
How Do I Know When to Replace Extension Cord Ends?
Aside from visible damage, a clear sign you need a replacement plug end male is if it’s too loose when you plug the cord into your outlet. This will cause you inconvenience as anytime; the cable can be dislodged from your wall.
On the other hand, you will need a female replacement end if there is a melted part somewhere due to overheating caused by circuit overloads.
Can You Convert Regular Extension Cord into Multi Outlet Extension Cord?
Yes, you can make a multi-outlet cable from an ordinary extension cord. All you need to do is to replace the extension cord female end with a customized number of outlets. This way, you can plug in multiple devices at once.
However, you should be aware of the current rating of the cord and your devices. If the former is low, even if you have a 3 outlet extension cord, it would be best not to use all sockets at once.
Conclusion
You can save some money by replacing extension cord plug that is damaged. Therefore, before you throw away your cord, see if it’s fixable.
For any three-wire connection extension cable, the above method on how to replace an extension cord plug is the best to follow. Keep in mind that simply covering any cord damage with electrical tape is not the proper way to repair it.
If you are unsure what to do with your cord, contact a professional for assistance.

I am Edwin Jones, in charge of designing content for Galvinpower. I aspire to use my experiences in marketing to create reliable and necessary information to help our readers. It has been fun to work with Andrew and apply his incredible knowledge to our content.