
When talking about electrical safety, one of the main topics that should be discussed is the existence of ground wires.
Although ground wires are not required for an electric instrument to work properly, attaching the ground wire to electrical box is a norm for electricians because it provides an additional safety feature that can save your life in accidents.
Normally, ground wires do not carry current. Current will only pass through ground wires when there is an excessive amount of it or the original path has been damaged.
If you’re wondering how to run a ground wire to an electrical panel, keep reading!
Table of Contents
Tool For Connecting Your Ground Wire to An Electrical Panel
- Ground bar or rod
Regarding the materials to be used in ground rods, it is highly suggested that you use galvanized steel, stainless steel, or copper-bonded steel. Among these 3, galvanized steel is the cheapest and often preferred by experienced electricians.
- Mallet
- Screwdriver
- Ground wire (usually a 6-gauge copper wire or bigger)
- Clamp
- Multimeter
- Protective equipment
Steps on How to Connect Ground Wire to Electrical Panel
Step 1. Ground bar or rod Installation
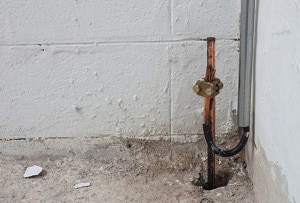
The first step in running a ground wire to your electrical panel is to first know where you want the excess current to flow. Since you cannot just leave your ground wire hanging or attached to the ground, you need a ground bar or ground rod where your ground wire will be connected.
It is suggested that you bury the rod up to 8 feet below ground and leave 3 to 4 inches above the ground where your ground wire will be attached.
If all conditions are met, you may start driving your ground rod to the soil outside your house with a mallet. Make sure a passerby won’t stumble on the above-ground rod where your wire is being connected.
Step 2. Attach your ground wire to the ground rod
Connect the ground wire to the rod using a clamp. Secure the connection.
Step 3. Keep the breakers off
Before doing electrical installations, it is imperative that you should always check your breakers and keep them off, unless you are about to test your work.
Turning off your breakers will let you work safely and avoid electrical damage or even electrocution.
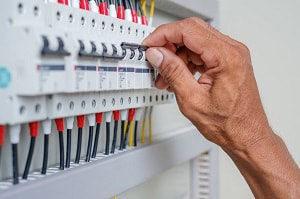
Step 4. Remove panel cover
The most electric panel covers or faceplates are intact by screws. To remove the panel cover, get a proper screwdriver to be used, either a flathead screwdriver or crosshead screwdriver, depending on what screw heads were used.
Step 5. Pick a proper knock-out hole
The knock-out hole is a detachable part on the panel’s surface where wires that should be inserted inside the panel are threaded.
Know the location of the proper knock-out hole to be used, depending on where you put your ground bar. Pick a hole where the ground bar or ground rod is nearest.
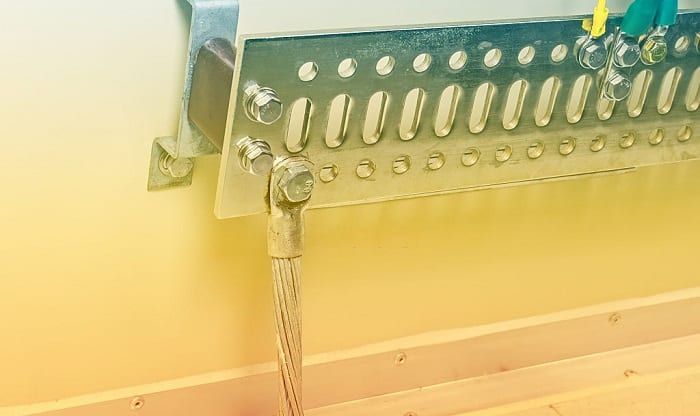
Step 6. Locate neutral bar or grounding bar
Most electrical panels have a grounding bar built inside where ground wires should be attached. However, there are some electrical panels where there are no built-in ground bars. If that is the case, your ground wire should be attached to the neutral bar.
Step 7. Connect the ground wire to the bar or rod
Using a #6 gauge copper wire, first attach one end of the wire in the ground bar or neutral bar inside the electric panel. Make sure you insert the wire through a knockout hole near the ground rod located outside the house to minimize the unnecessary bending of the grounding wire.
Carefully fix the ground wire until it reaches the ground rod located outside the house. You may use wire ties if necessary to avoid wire tangling.
On the other end of the wire, make sure that the end is completely attached to the ground bar in order to eradicate the possible loosening of the ground wire completely.
Also, the wire should not hinder any pathways. Make sure also that the ground wire is free from thorns or damage.
Step 8. Finish up
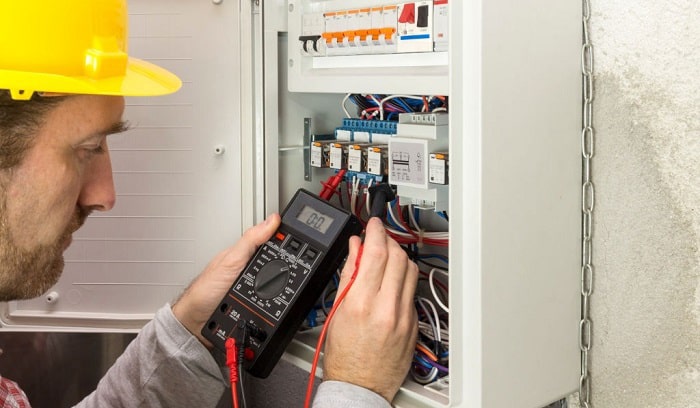
Switch the breakers on and then start testing. Do not forget to use personal protective equipment when dealing with electrical testing.
You may use a multimeter to test for resistance. It should be close to Zero “0” to say that grounding is effective.
If everything goes perfect, close the faceplate and administer the screws into their original places.
Importance of Grounding
Grounding is the process where you attach a ground wire into the grounding bar to prevent excess current from flowing through undesired locations.
We can all agree that the main purpose of grounding your electric panels, even appliances, too, is to prevent electrocution when the normal path of current is damaged or deemed unserviceable.
Having your electrical panel grounded, you then keep all your outlets grounded since all outlets in your house must be connected through an electrical panel, which serves as the main energy source.
Research says more than one death per day happens due to electrocution in the US alone. Having an extra layer of safety features in your house is the best thing to do to eliminate or mitigate risks that can put your life at stake.
Conclusion
After reading this article, you should now know how to run a ground wire to an electrical panel.
Whenever working with electronics and electrical wiring, safety should be our utmost priority. Safety precautions should not stop after completing the job because there are other risk factors that may lead to serious injury or even death.
Attaching a ground wire to an electrical box mitigates the risk of injuries or even electrocution. Share this article if you feel that others might want to know about this too.

I am Edwin Jones, in charge of designing content for Galvinpower. I aspire to use my experiences in marketing to create reliable and necessary information to help our readers. It has been fun to work with Andrew and apply his incredible knowledge to our content.