
It is hard to do a breaker maintenance job or know the right breaker to flip when your electrical panel is not adequately labeled, right? Of course, you’ll want the most efficient and non-invasive steps when learning how to trace a circuit breaker.
You can choose from several options, depending on your time and budget. While a circuit breaker finder is a convenient tool, a manual inspection is the most cost-efficient choice.
It will only require you to flip a breaker and test an outlet/light. Or you can trace the wires from the receptacle you need to inspect until you find its breaker.
Table of Contents
What You Will Need
Identifying circuit breakers is not a job that requires complicated equipment, like what professional contractors have. However, you’ll need the correct tools that can guarantee your safety and lead you to that mystery breaker in no time!
1. Electrical Blueprint
First of all, you’ll need to know where the main electrical panel is and where the connected outlets are. Now, to get a good grasp of the context of your building, a blueprint is always your best friend. This diagram will help you trace every wiring without tearing down a wall or pulling all the strings out.
Basically, it will be your primary reference as you trace the electrical circuit to breaker. You can acquire your electrical blueprints from your county clerk’s office or the developer of the house. However, you can also draw a map yourself and locate every outlet and light receptacle your breaker panel feeds.
2. Notepad and Pen

Next are some of the basic items you can find anywhere, a pen and paper. After tracing electrical circuits, a record which circuit breaker and outlet matched so you’ll have a reference for the future.
Neglecting this vital list will waste your time and energy once you forget the breaker location for each appliance. Like an electrical blueprint, your notes will also serve as your reference for labeling your load center.
3. Power Indicator
When we talk about power indicators, it doesn’t pertain to any advanced tech device you can’t afford. It could be anything, as long as it can notify you when you switch the power on or off. You can use a lampshade, for example. This lamp will give you visuals if the CB you flicked off shut down the power to the outlet.
Anyway, there are different circumstances where a lamp is not enough because you can’t see its light near you. In this case, use any audible devices like the radio, so there’s a sound that can reach you even if the outlet’s located upstairs or outside the house. A partner or a relative can help you as well.
4. Multimeter
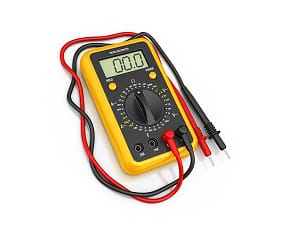
Multimeters can also serve as a power indicator for your outlets. However, in this project, we will use this for identifying live wires and other powered areas around your electrical panel before opening it. Use this device before laying your hands on the parts of the panelboard or receptacles you will manage later.
A multimeter is an all-in-one voltmeter and ohmmeter, so it is perfect for your safety measures and performance checking of every circuit breaker you have. Also, after your tracing job, you will know the breakers’ electrical readings, which is beneficial for ASAP repairs.
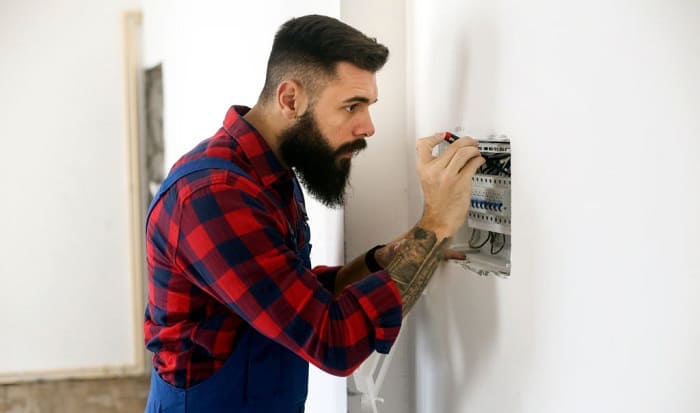
5. Protective Gloves and Safety Glasses
Like in my previous tutorials, I always emphasize safety. So, whatever work you’re doing, as long as there’s electricity involved, never undervalue the importance of proper protective equipment.
With this project, insulated gloves and safety glasses are enough to protect you from any power surges that may occur while you flip your circuit breakers. Take note that you’ll be working with electricity, so never do the task unprotected. Also, if you have insulated mats or boots, use them. Never work barefoot.
Steps for Tracing a Circuit Breaker
Trace breakers during the day to create less disturbance for the occupants in the building. It’s a terrible idea to do it during nighttime, when all lights are on and people are home, so do it as early as the sun is up.
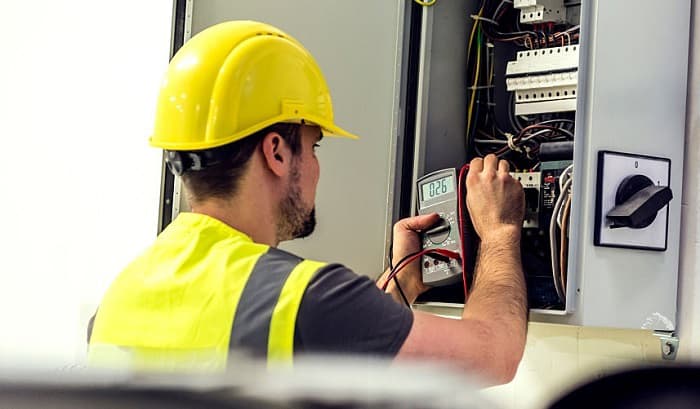
Step 1. Inspect the panelboard
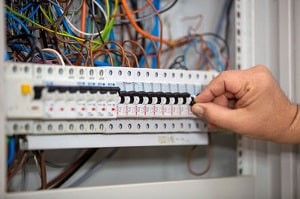
The power of an electrical panel is no joke, having 100-200 amps that can instantly kill. That’s why accidents can happen when a person makes contact with it unprepared and unprotected. With your insulated gloves and safety glasses, use your multimeter to check the surface of your breaker panel.
You won’t need to open the panel cover when you trace circuit breakers; just open the outer door. It is safe to touch the panel door and the circuit breakers under normal circumstances. Nevertheless, if you’re going to remove the lid entirely, avoid getting in contact with the service lugs and large wires, or they will zap you.
Step 2. Take a photo of your breaker panel
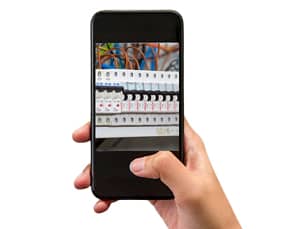
After you meet the safety requirements to work on the electrical panel, you can start matching the breakers to their circuits. First, take a quick photo of the original positions of your circuit breakers. This picture is crucial for you to remember what’s off and what’s on in the first place.
Mixing the “off” breaker with the “on” breaker is what we’re trying to avoid here. This confusion is a common maintenance mistake for electrical panels with multiple circuit breakers. So, to avoid problems after work, a snapshot can help you restore the alterations you’ve made.
Step 3. Prepare your power indicator
Find a partner and/or an indicating device that will help you check the corresponding outlets when you flip a breaker. Using your electrical blueprint or map, plug the indicator into the outlet you want to trace. If a relative is assisting you, it’s best to bring your smartphone or walkie-talkie to communicate clearly.
On the other hand, if you are working alone, plugging a radio into an outlet is the best way to create a sound that will notify you even if you’re far from the test device. Yes, working alone means you need to go back and forth to move the power indicator, but exhaustion won’t be much of a problem unless you have more than ten breakers to deal with.
Step 4. Flip the breakers one by one
At this point, everything’s set and ready. Switch a breaker off or on and see if your indicator shows a change of state. Then, repeat the process for the remaining outlets in the building.
You can sort out your breakers quickly by looking at their size.
15-amp and 20-amp breakers are usually designated for outlets and lights, while ganged breakers like double-pole CB feed 240V appliances. It’s only a matter of trial and error, but this fact may help you minimize the flickering of circuit breakers. Too much breaker switching can lead to an electrical hazard or create severe damages to the electrical panel.
Step 5. Write everything down

During the finding circuit breaker process, make a note of what area of the house corresponded with a breaker you clicked. For example, you can say breaker A turns off the lights in bedroom Q, or breaker B cancels power to outlet R, and so forth. You can use letters or numbers to simplify the labeling, but please keep it organized to prevent work repetition.
Step 6. Label breakers properly
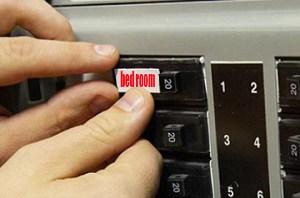
Lastly, label your panel. Write the numbers/ letters of every breaker slot, occupied or not, on a piece of paper. You should copy the exact list of the breakers inside the panel. Use the information from your notepad.
Once you know which breakers are responsible for every circuit, stick your properly-labeled diagram on your panel door. This way, anyone can access it. If you want, you can also label your outlets or light receptacles so that when the time comes and they need fixing, you can effortlessly trip their breakers.
Pro tip: If there’s a circuit or two that you can’t find anywhere, keep their circuit breakers off. Sometimes there are untraceable circuits due to past renovations you’re not aware of. So, let it go, and if it doesn’t bother you for weeks, then it’s not that important, or it’s just another minor circuit lurking somewhere in your crawlspace.
Conclusion
Did you have fun on your search for the circuits of your breakers? Mapping your circuit breakers provides more accessible and safer electricity management for your home. When a CB trips, you’ll learn which circuit is the culprit right away.
Learning how to trace a circuit breaker will help in addressing your safety issues, making it easier to control the power of the different areas of the house.
So, what do you think about this tutorial? Did you like it? Amused? Confused? Let me know in the comments or share the article if you loved it.

I am Edwin Jones, in charge of designing content for Galvinpower. I aspire to use my experiences in marketing to create reliable and necessary information to help our readers. It has been fun to work with Andrew and apply his incredible knowledge to our content.