
It doesn’t take an electrician to remove a breaker. Learning how to remove a Zinsco breaker, for all the notoriety they’ve built up over the years, takes some strategic thinking, though. I admit that it can be a pain to take out a Zinsco circuit breaker in some panels, hence, this guide.
Before we begin, always beware of possible electrical hazards when doing Zinsco breaker replacement. With that caveat out of the way, let’s start with your options:
Table of Contents
Ways to Remove a Zinsco Breaker
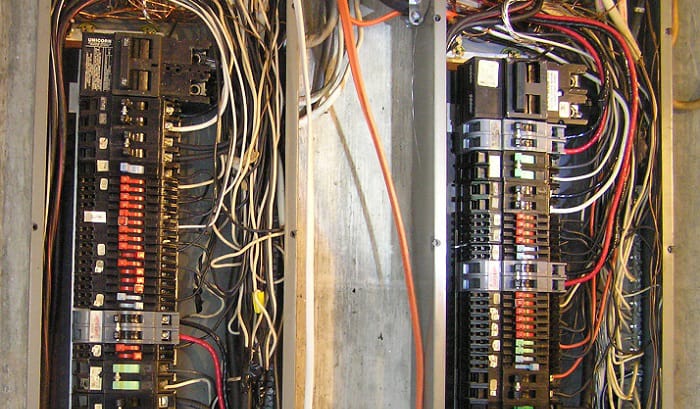
Depending on how the breakers are arranged in the panel, how they’re locked in place, the accessibility of the screws, and the notorious possibility of arcing at the bus connections, you may find it easy or hard to remove a Zinsco circuit breaker.
Take Note: If there’s no main breaker, I highly recommend letting an electrician handle things.
Here are the ways to take out these breakers from easy setups to more difficult ones:
- Vertically arranged Zinsco breakers are easier to take out. For this, you only need to kill the power, turn off the breaker you’re going to remove, unscrew the conductors, then pull it out.
- In some horizontal setups, the screws are trickier to access. You may need to use needle-nose pliers instead of screwdrivers to take the screws off. You may have to toil for hours to get the metal bars to release, though.
- Another effective but risky way is to use a cold chisel or a crowbar to dislodge the end of the bar. I don’t recommend this as it may damage the breaker and panel, especially if you aren’t used to the tools. However, it’s worth doing if you mean to just get the old breakers and scrap the entire panel.
Patience pays off in most cases, despite the admittedly tough work of removing the breakers. Some people are actually motivated by rebuilders who pay good money for Zinsco breakers still in good working condition.
Prepare the Following Tools
- Screwdriver
- Needle-nose plier
- Channel-lock plier
- Multimeter
- PPEs
1. Turn Off the Power on All Circuits
If you’re not confident in identifying live spots in the breaker, don’t hesitate to wear insulated gloves, boots, and other PPEs before starting. Kill the power to all circuits by turning the main breaker off.
Use the multimeter to double-check that there’s no power supplying the panel. Remember that the wires attached to the main breaker remain live.
Always be mindful of sizzling sounds when working, as they are a clear sign of a malfunctioning panel and damaged breakers. I won’t be surprised if you’ll have no other choice but to replace the panel if you encounter this issue the next time your electrician comes to visit.
2. Turn the Breaker Off then Unscrew the Conductors
Turn the breaker’s switch to the ‘Off’ position.
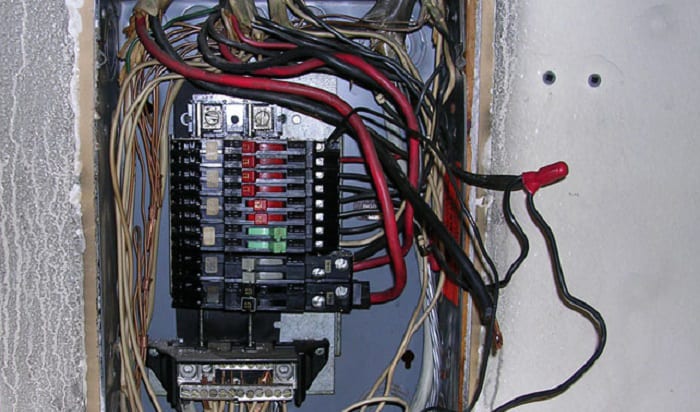
Remember, a couple of panels have a bar (not the bus bar) that needs to be raised for you to remove the breaker. This bar should slide up and down on screws, so be sure to unscrew them first. If you can’t access them with a regular screwdriver, try using a needle-nose plier.
Depending on the breakers’ arrangement (whether they’re horizontal or vertical), you may have a hard time accessing the screws. I suggest you try every strategy you can think of with the tools available to you.
3. Pull the Breaker Out
In some cases, the breaker should come off with just minimal pulling on your part. Since these are obviously old breakers, you may end up struggling because the breaker has melded with the bus bar.
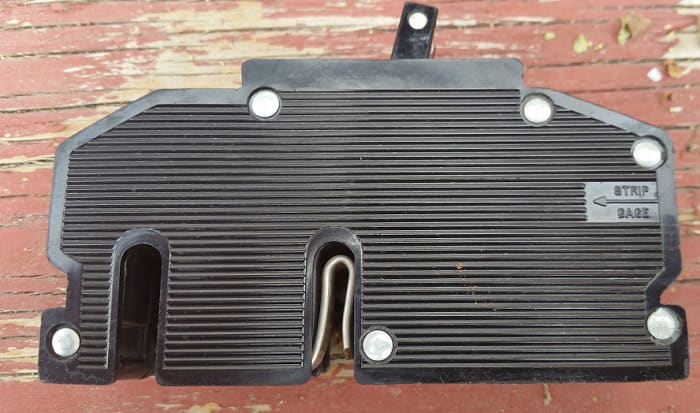
Really old panels tend to have two fins where the breakers latch onto with their twin “mouths”.
Some tend just to slide right off so consider yourself lucky if that’s what ends up happening.
Struggling to pull it out? The safest tool I recommend, instead of a janky crowbar, is a channel-lock plier. Carefully pry it out with this tool. You may have to apply extra force, especially if the breaker has thoroughly melded with the bars or fins.
4. Check the Breaker for Damage
If you had a hard time but got it out in the end, you deserve a pat on the back! All the same, if it was a breeze because you pretty much dealt with the dreaded Zinsco!Zinsco breakers are prone to be damaged once they’re taken out, especially if they’ve been in service for a long time. I’m assuming you’re hoping that you can still have it repaired or continue to use the bus bar it was installed on with a replacement.
If there’s damage on the bus bar, refrain from installing a replacement on the spot. Have the breaker checked by an electrician or rebuilder to determine if it can still be repaired.
Related:
It’s Best to Replace the Entire Panel
For all the risks that come with these obsolete breakers and panels, it’s a smart move to just replace a Zinsco panel, assuming it’s the one you have on your property. Are you still having second thoughts or think it’s not worth the cost?
I invite you to watch this video, which outlines some of the most compelling reasons why you shouldn’t be using these old panels to serve your property’s electrical system in the long run:
Another route you can take is retrofitting, which effectively replaces the entire load center but keeps the panel box. Take a look at the Zinsco panel retrofit kit offered by companies like Eaton and Cutler-Hammer when weighing your options.
Conclusion
I hope that you’ve found this guide on how to remove a Zinsco breaker useful. Again, don’t let your guard down when working with this particular breaker and panel because Zinsco has long been out of commission.
Follow every step carefully, and if you ever face a massive stumbling block, I highly suggest you drop your tools and call an electrician to handle it for you.

I am Andrew Wright. With 8 years of experience designing, installing, and maintaining electrical power systems. I love my job, and I have always wanted to offer others the necessary help so they can take care of their houses.