
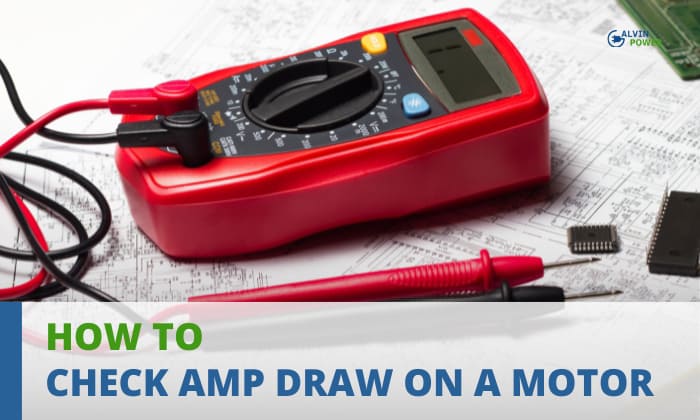
Wondering how to check amp draw on a motor? The simplest way to do so is using a multimeter or clamp meter to measure the current directly.
To test amperage, connect the meter in series with the motor by attaching the leads across the power terminals.
Follow the tips outlined below to accurately measure no load, running load accurately, and stall amps using a multimeter or with a clamp meter.
Table of Contents
Ways to Check Amps on a Motor
From our experience, a multimeter can directly measure check motor amps for a DC motor, while a clamp meter works better to test an AC motor.
Step 1: Set Up the Multimeter

With a multimeter, begin by adjusting it for amp measurements, selecting the highest amp setting available to prevent damage if currents exceed 20A unexpectedly. Verify that the black common lead is properly inserted and rotate the selector dial to the amp setting.
Step 2: Get Readings on No Load Conditions
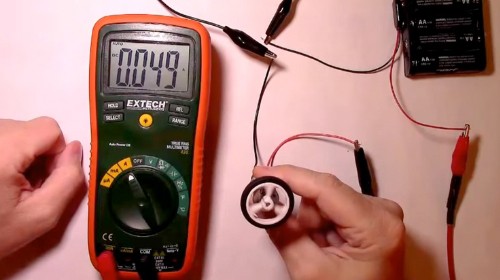
Connect the power supply’s ground wire to the motor’s negative terminal. Attach the multimeter leads in series across the positive and negative motor wires.
Power on the motor and observe the multimeter for the “no load” amp reading, typically around 50mA.
Step 3: Stall Current Spikes
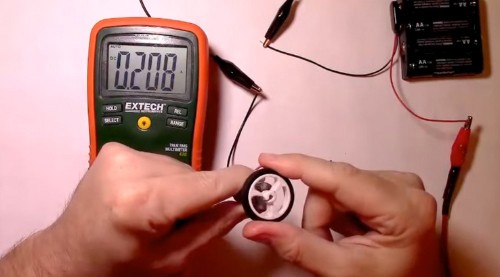
Stop the spinning shaft of the motor intentionally using insulated gloves. Look out for a significant spike in the current draw, indicating the motor’s maximum demand during a stall.
Step 4: Get the Actual Running Loads
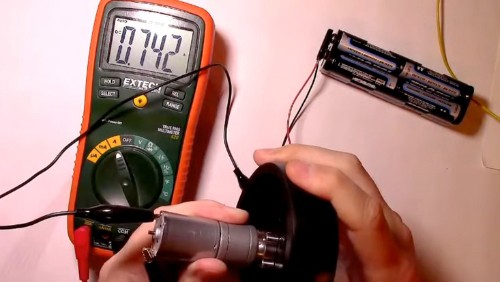
Install the motor into its real-world application, such as a conveyor belt. Activate the mechanism under a representative load to observe the amp draw, which falls between the no-load and stall values. Heavier loads result in higher currents.
Step 5: Interpreting the Span
Understand the full spectrum of current demand, considering low-end, spike, and operating amperages. For the 6V motor I tested, the current ranged from 50mA to 700mA.
Choose a motor driver and wiring that exceeds the highest expected load to provide a safety margin for both surge and continuous extremes.
Step 6: Test Alternate Voltages
Take note that voltages alone do not indicate amperage; empirical testing is essential. Repeat the testing methodology for different voltage motors (e.g., 12V or 24V) to accurately determine current requirements.
Use direct meter measurements for reliable data when integrating motors into electromechanical systems.
This tutorial video demonstrates the process for a motor 12v. The same method applies to motors of any voltage
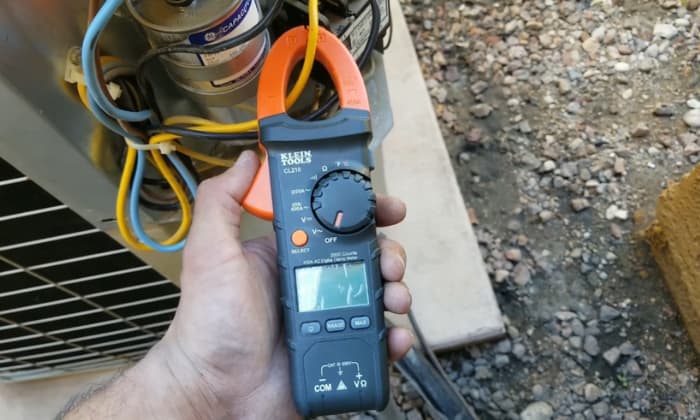
Using a Clamp Meter
Before carrying on with the task, you should put on a pair of rubber gloves and protective goggles to ensure safety.
1. Place the jaws properly.
Close the jaws of the clamp meter around the conductor you want to measure amp draw.
2. Get the reading.
Set it to “current”. Then, check the display on the clamp meter to observe the amperage flowing through the conductor.
3. Allow it to cool.
If taking multiple readings, allow the clamp meter’s jaws to cool to prevent potential damage.
4. Disconnect safely
Once measurements are complete, disconnect the clamp meter from the conductor for safety and to proceed with other tasks.
Conclusion
Make sure to follow the tips outlined above on how to check amp draw on a motor, so that you can accurately assess its performance under different conditions.
By understanding the no-load, stall, and load amp draw, you’ll be well-equipped to select appropriate motor drivers and ensure the efficiency and safety of your electromechanical projects.
Remember to prioritize safety, choose the right tools, and interpret the data effectively for reliable results in an amp draw test.

I am Andrew Wright. With 8 years of experience designing, installing, and maintaining electrical power systems. I love my job, and I have always wanted to offer others the necessary help so they can take care of their houses.