
It pays to know how to feed a subpanel from a main panel, especially as it’s not as technical as installing a subpanel from scratch. I’m assuming you already have it in place, with the PVC conduit underground in good working condition, and ready to feed through breaker on the main.
This guide will walk you through the entire process. You will know what wire to use relative to your power requirements and the breaker that will feed it from the main panel. You will also learn how to attach the wires to the subpanels while keeping them protected.
Table of Contents
Gather These Things Before Starting
- Right-sized feeder wires
- Feeder circuit breaker for the subpanel (optional)
- Voltmeter or multimeter
- Fish tape
- Electric tape
- Clips and straps
- Hammer
- Wire Strippers
- Insulated gloves
Step-by-Step Guide to Feed a Subpanel from a Main Panel
1. Confirm everything you need.
Feeding a subpanel technically means wiring it, so you have to be comfortable doing that and have clear knowledge of local Code requirements for this project, particularly the ones involving wiring.
Keep all these factors in mind:
- Make sure your total load and draw won’t exceed the feeder wire’s current rating.
- Always match the sizes of the feeder wires and the feeder breaker on the main panel. Both should optimally be able to handle the load that they’re expected to serve.
For example, a 200 amp subpanel connected to 100 amp service with a 6 AWG wire that’s already in place should be fed by a 60 amp breaker. Remember: the breaker only protects the wires!
- You don’t need a separate feeder breaker for the sub panel if the main breaker in the main panel already matches the feeder wires.
- Use Table 310.15(B)(16) (https://conduit.site/tables/table-310.15-b-16.php) as your main reference for sizing.
- Don’t confuse a subpanel feed breaker with a sub feed breaker, as the latter is a branch breaker on the main panel that’s meant to accommodate higher amp ratings that the panel can’t handle.
2. Allocate a breaker in the main panel for feeding the sub panel.
If your conduits and wires are already in place and meet your expected load, then you need to rate the breaker according to the current rating of the subpanel feeder wire.
Also, take note that having a 100A service panel doesn’t mean that you can’t use a 60A breaker on it. Just make sure you match the breaker with the conductor.
- If you’re settling for 60A as a feeder, make sure you size the cable for that or, to be exact, use the required 6-gauge copper wire or 4-gauge aluminum wire.
- The same goes if you’re trying to wire a 100 amp sub panel from a 200 amp main panel and feed it with a 100A breaker. That would require a 4-gauge copper or 2-gauge aluminum.
- Remember: you can use any sub feed panel size as long as its current rating is less than or equal to the size of the breaker feeding it. For example, if the panel uses 50 amps of adjusted load, then the breaker should be rated for that ampacity or more.
3. Make sure your wires are properly set up.
Double-check the wiring run that you will need to do to accommodate the feed in your electrical sub panel wiring diagram.
If the feeder wires are located underground and you’re having issues with them, you can do some diagnosing on the main panel and subpanel using a multimeter.
Need to know how to pull the wires for installation, replacement, and upsizing purposes? Assuming you’re doing a rewire or want to install sub panel in detached garage, learning these things is necessary.
The same goes if you’re trying to wire a subpanel in a shed located a hundred or more feet away from the main service panel because voltage drop becomes a big factor in such cases.
Moreover, take note that you need to install one or two grounding rods if the subpanel is placed in a structure separate from the one housing the main panel. An average 220v sub panel wiring diagram will confirm if the rods are needed or not.
Ultimately, routing and running the wire is a wholly separate topic, which may even require you to dive into trenching, conduit laying, and sub-panel mounting. You may want to brush up on how to install a subpanel in a garage for this.
Here’s a helpful video explaining how you can check and troubleshoot a subpanel feeder wire that’s located underground:
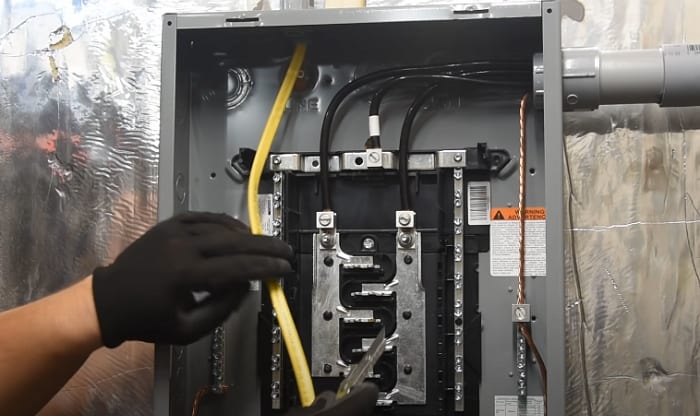
4. Pull the wires through the conduit.
Of course, this is assuming you’re wiring for the first time or are doing a rewire.
You can skip this step if you’ve already confirmed that the present feeder wire is still good to go, and that you’re ready to make the connections on the sub panel.
If you want to know how to pull the typical 4 wires (2 hots, 1 neutral, and 1 ground) through the existing conduit, you can get numerous helpful tips from this detailed video. The fish tape and some electric tape get the job done for me every time.
Here are some foolproof tips to make the task a breeze:
- Use the most appropriate wire-pulling lubricant if you’re encountering too much resistance. Choose only the ones that are designed for pulling polymer coated conductors.
- Work in coordination with another person. One should be the feeder, the other the puller. If the run is extra long, use a radio or communicate through phones/smartphones.
Just pull enough wire to reach the subpanel, whether it’s mounted in an isolated structure or within the same building as the main panel.
5. Start feeding.
Everything you’ve been doing has been leading up to this: the actual feeding process. Whether you’re trying to add a subpanel to a 200 amp service or to one with a lower ampacity, there’s no difference in wiring them.
Before beginning, turn off the power on the main panel, then put on your insulated gloves.
Afterward, head to the subpanel and look at the knockouts that you’ll use for convenient wire entry. Go ahead and knock out the holes that your wires will be entering with a hammer, then push and position the cables for feeding.
I suggest using clips and straps to bundle your wires together for less clutter.
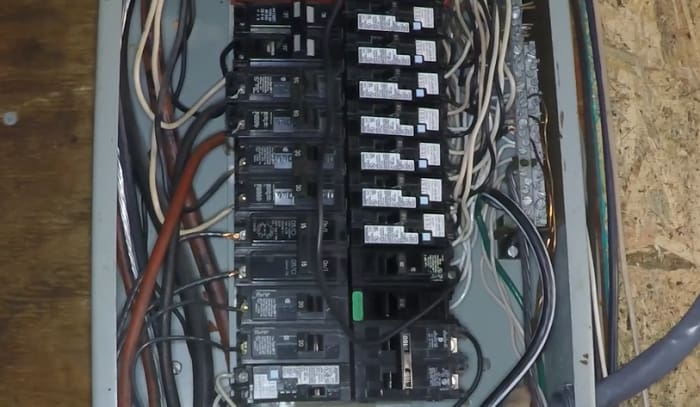
6. Attach the wires to the correct terminals.
Strip the wires with the appropriate tool.
Keep the ground wire (green) and neutral wire (white) separate. Attach the former to the ground bar and the latter to its dedicated neutral bus bar. The hot (black and red) wires go to the hot bus bars.
Pay attention to the torque settings recommended for your chosen subpanel.
If the ground bar is not yet installed, you just need to screw it in place. Most sub-panel kits have this part ready for mounting.
I’m also assuming that your detached subpanel already has a grounding rod available for use. You won’t need the rod if it’s in the same building as the main panel.
Otherwise, you’ll need to have it installed by an electrician, and I also recommend you let him or her handle the grounding, since plenty of DIY tutorials online tend to violate NEC rules.
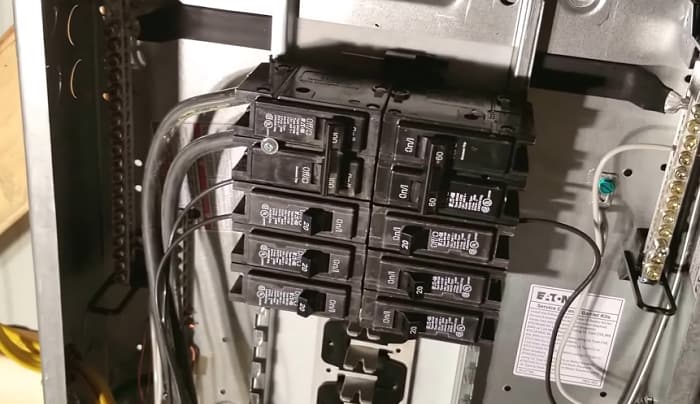
7. Install the feeder breaker.
Go over to the main panel once all the wiring’s done. Push the feeder breaker (usually a double-pole one) in place, then attach the opposite end of the hot wires (black and red) to the breaker.
Again, you don’t need a feeder breaker if the main breaker on the service panel is of a size that can suitably protect the feeder wires. You can attach them to the lugs (e.g. sub feed lugs) instead of a separate branch breaker. I’ll explain a bit about these lugs in the next section.
With all that done, you only need to turn on the breaker. Check for power supply on the subpanel by using a voltmeter or multimeter.
Suggested Solutions for Multi-Feed Setups
- If you’re doing a multi-feed setup, you may want to look into using sub feed lugs. It’s a good option if you’re trying to feed two panels from the same main panel, with the first box “sub feeding” the second via those lugs (i.e. daisy chaining).
- Another option is using feed-thru lugs, which have a similar downstream arrangement. One of the main differences between the two is that feed-thru lugs are protected by the main breaker, while sub feed lugs are protected by the feeder breaker.
Admittedly, most of these setups are rare as they’re usually only applied to commercial and industrial settings. They also require you to be familiar with feeder tap rules, which are considered the trickiest guidelines in the NEC.
Naturally, you should ask an electrician about them first to know if they suit your property’s requirements.
FAQs
Can you run a 100 amp sub panel off a 200 amp main panel?
Since the subpanel requires a 100A breaker at most, yes, you will need to pair the breaker’s size with the correct wire size, which is at least 4 AWG copper or 2 AWG aluminum.
Always look at the breaker’s amp rating instead of the panels’ total ampacities when deciding the correct wire size.
Can my main panel handle a sub panel?
Yes, as long as the main panel still has the capacity to handle the additional load of the subpanel, with all the other loads on the main panel taken into account. Anyway, you always have the option to upgrade the main panel so that it can sufficiently feed the subpanel.
This is why I always suggest property owners to choose a high-amp (at least 200A) main panel from the get-go for better efficiency, GFCI readiness, among other perks.
How far can subpanel be from main panel?
All panels need a clearance of at least 36 inches at the front. There’s no set rule when it comes to the distance between subpanels and main panels. There are projects involving distances up to 500 feet.
Still, it’s not really practical to run wires that long, since you’ll likely have to deal with serious voltage drop issues.
Conclusion
How’d you like my guide on “how to feed a subpanel from a main panel?” Here’s a quick rundown of everything you need to do:
- Familiarize yourself with local Code laws regarding wiring.
- Figure out the right breaker and wire size to feed the subpanel.
- Install the wires or check if they can handle the feeder breaker or vice versa.
- Attach the wires to the correct buses after you’ve positioned and stripped them.
- Check if the subpanel has power.

I am Edwin Jones, in charge of designing content for Galvinpower. I aspire to use my experiences in marketing to create reliable and necessary information to help our readers. It has been fun to work with Andrew and apply his incredible knowledge to our content.