
A subpanel helps distribute electrical connections to separate sections of a home like a shed or in pole barn.
You will save a lot of money and energy by not having to run each circuit wire back and forth to your main panel. A sub panel is also useful when your primary service is fully occupied.
If you want to learn how to wire a subpanel in a shed or any part of your house, you can follow the materials and guide I created below.
Table of Contents
Step-By-Step Guide to Wire a Subpanel in a Shed
Before working on your home electricals, you should first verify if your local electrical codes allow you to do the DIY installation of the shed panels. This is important, since not all cities allow it or if they do, require you to get a permit.
What to prepare
- Subpanel and wire clamps
- 12-gauge wire
- Circuit breakers for various circuit installations
- Set of screws
- Electric drill and 1-inch diameter/7-inch long drill bit
- Shovel
- Metal and plastic conduits
- Conduit bender and a pipe wrench
- Fish tape
Step 1. Plan a Route and Bury the Wire
Before you begin installing a subpanel in your shed or other detached areas in your home, you must first plan a route for its feeder with the main panel. You can use an underground connection for this trick by using a metal conduit.
- This allows you to connect your subpanel to your electrical system’s main service.
- Furthermore, burying the wire can help eliminate electrical hazards while ensuring the line’s safety.
You can dig a trench using a shovel. The depth of the trench will be 6 inches for metal conduits.
Conjoin metal pipes using a wrench and bend both ends of the connection with a bender. The pipes should extend from your home to the subpanel.
At the same time, using fish tape also makes it easier to place the feeder wire inside the conduit.
Finally, the conduit covering or LB housing can be used to secure both ends of the pipe.
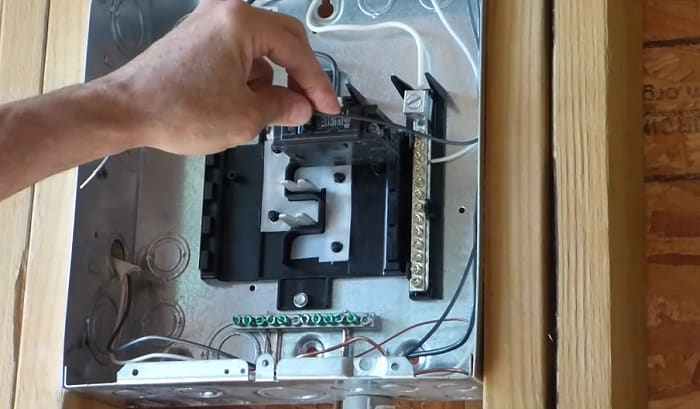
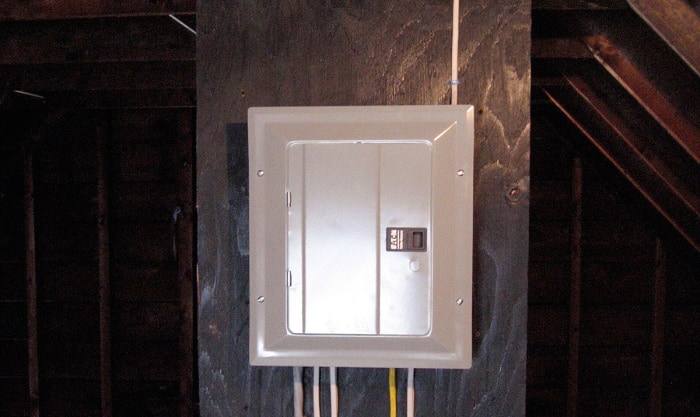
Step 2. Install the Subpanel
You can install the subpanel in your shed when the feeder line is complete.
- In this case, you should place the panel in an open area at least 3 feet wide and free of obstructions.
- Following this tip allows you to have a very accessible electrical service that may benefit you in terms of safety.
Then, you can connect the feeder wires of your primary connection directly to each terminal. It should come with 2 wires – red and black wires for the two hot terminals, bare or green wire for the ground, and white for the neutral bar.
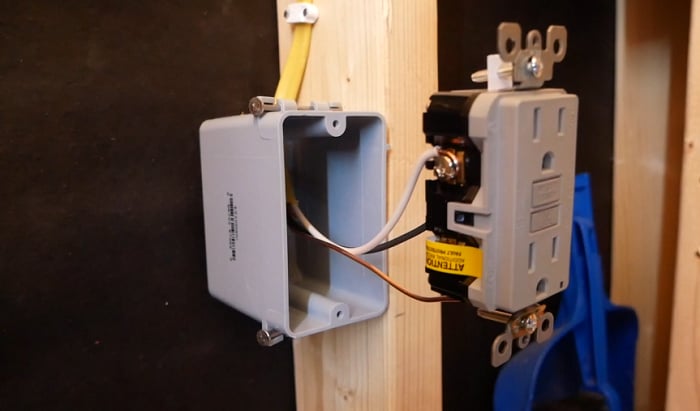
Step 3. Install The Circuits of Your Shed
You may now install the shed’s lighting and outlets using any simple shed wiring diagram. However, you can use a standard height of 48 inches for the lighting switch and 12 inches for the outlet.
A 12-gauge wire is typically used for a 15-amp or 20-amp circuit with a 120V power supply. Though a 14-gauge wire can be used for 15A lighting circuits, a 12-gauge size appears to be much safer because larger wires have less resistance than small ones.
On the other hand, the recommended wire size for a 30 amp 220V circuit is 10-gauge. This circuit will enable you to use high-powered tools like a table saw.
You can use the electric drill and a 1-inch diameter drill bit to make a hole in your wall stud, so your wire can pass through it.
Step 4. Connect the Feeder and All the Circuits
Before connecting all of the circuits, check to see if there is a green screw in the middle of the two neutral bars. This screw is used to bind the neutral bar to the case, which connects the ground and the neutral.
Since we are making a subpanel connection, you need to remove this screw.
Also, don’t forget to install the ground bar directly to the panel for the ground connection.
Then, you can install all the required breakers for the circuits you made and securely connect each one of them.
Step 5. Connect the subpanel to the Main Service Panel
Outdoor subpanel installation requires the use of a GFCI breaker connected to the main service panel. This is the case because the NEC mandates GFCI protection for all outdoor electrical installations.
Remember to switch off the main breaker before you wire a subpanel into a main panel to avoid electrocuting yourself.
Then, you can switch on the main breaker in your primary service panel and the feeder breaker. Also, switch on all the circuits inside the sub-panel, which is now ready for use.
Helpful Tips: Installing an extra 8 ft. long ground rod outside the shed is necessary if the shed is outside of your home. This rod can be used to connect a copper wire and attach it to the ground bar for better grounding
The method above can also be used to install sub panel in detached garage. This way, you don’t need to search for a detached garage sub panel wiring diagram to complete the process.
FAQs
Does a Subpanel in a Shed Need a Main Breaker?
Electrical standards do not require placing a primary breaker switch on the subpanel for shed, particularly if it has less than six circuits.
However, having a main disconnect attached to the sub panel allows you to shut down all of its circuit connections without returning to the main panel.
How Do I Run Electricity from My Shed Panel?
To bring electricity into a shed sub panel, you can use a rigid metal conduit or RMC. With the help of RMC, you can safely bury the wire from your main electrical service and extend it to your sub panel.
This way, you can deliver power safely to your shed without worrying that the wire can get damaged anytime.
Can You Wire a Subpanel with 3 Wires?
In the old days, you would be allowed to use a three-wire connection in a small breaker box for shed. This means that the neutral and ground connections would be connected as one.
However, today’s electrical code will not allow you to make this kind of connection for adding a subpanel. It requires that the ground and neutral be installed separately.
Conclusion
You don’t need to use high-rating subpanels to bring electricity to your shed or other places. Sometimes, a 60 amp or 40 amp sub panel for shed is enough to support your power needs.
In some cases, electrical sub panel installation is not that complicated, particularly if you only need to install a few circuits.
Knowing how to wire a subpanel in a shed using the above guide will make it easier to get the job done. However, always consider checking your local electrical standards first before making any changes to your home’s panel.

I am Edwin Jones, in charge of designing content for Galvinpower. I aspire to use my experiences in marketing to create reliable and necessary information to help our readers. It has been fun to work with Andrew and apply his incredible knowledge to our content.