
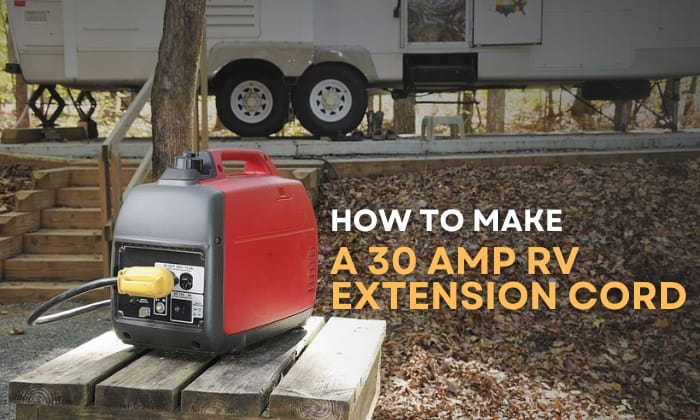
Regardless of your purpose for wanting to learn how to make a 30 amp RV extension cord, consider it a nifty skill well worth acquiring. After all, you never know when you’ll have to use a 30 amp extension cord for RV that needs to span a great length, whether it’s 50 feet, 100 feet, or even longer.
It pays to be able to build an extension cord with higher-quality materials that ensure longer-lasting durability.
At the same time, you’ll have to account for distance when deciding the wire’s size. This guide explains every important step thoroughly.
Table of Contents
- What to Prepare Before Beginning
- How to Build a 30A RV Extension Cord
- Step 1. Cut the cable to the appropriate length, then strip the ends
- Step 2. Strip the hot, neutral, and ground wires, then twist them together
- Step 3. Open the plug, then start attaching each wire to the right terminals
- Step 4. Secure the wires, then re-screw the plug’s cover
- Step 5. Open the outlet’s cover and the knockout for the wires
- Step 6. Start wiring the outlet, then test your completed 30 amp extension cord
- Tips to Remember When Choosing and Using an Extension Cord
- FAQs
- Conclusion
What to Prepare Before Beginning
- Three-prong plug and outlet
- Right-sized cable wire (10 AWG or 8 AWG)
- 120V electrical outlet
- Wire stripper
- Screwdriver (flat-head or Phillips screw head)
- Cable cutter (optional)
- Tape measure (optional)
- Note: Regarding the wire you choose, make sure the size suits the entire run you intend to use the camper 30 amp extension cord for. By default, if you’re just making a short 30 amp RV cord that’s around 10 feet long, then it’s OK to use the standard 10 gauge wire rated for 600V.
Once the run reaches double that or 20 feet, then it’s better to take it up a notch by opting for an 8 gauge wire (or 8/4 wire to be exact) instead.
Lastly, a typical travel trailer 30 amp extension cord needs a 120 volt outlet. It’s OK to use a 220 volt one instead if you’re trying to make a 50 amp RV extension cord.
These steps still apply to cords with that amperage as well. Again, you just have to make sure you’re using the wire with the correct weight relative to the amp values.
How to Build a 30A RV Extension Cord
Step 1. Cut the cable to the appropriate length, then strip the ends
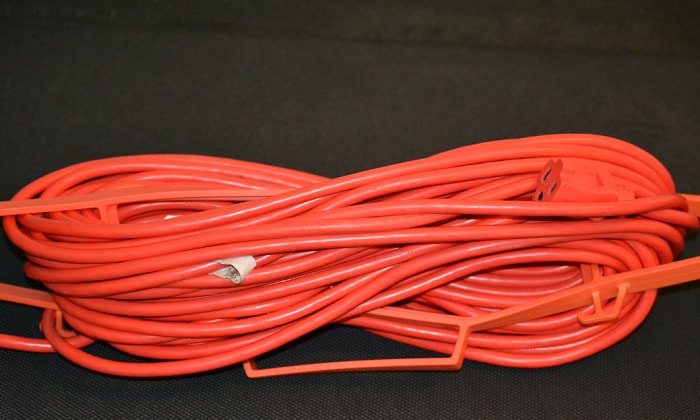
Unless you’re creating a 30 amp RV extension cord 100 ft, for which you can buy cables for exactly that length, you have to cut the cable to match your intended coverage for the extension cord.
Next, stripping the cable’s insulation is a must for any standard extension cord or generator cord, as you need to expose the conductors inside for attaching later. Use any tool you see fit – for some, good, old scissors will suffice, while for others, wire strippers work better.
Strip both ends, one of which will be wired to the plug and the other to the receptacle. Cut out the paper separators.
Step 2. Strip the hot, neutral, and ground wires, then twist them together
Lightly separate the three wires at each end of the cable, then use the wire stripper to strip them. Expose them by no more than ¼ inch.
In the same manner, when you’re building a 30 amp generator extension cord, you have to twist the exposed wires of all three conductors at both ends. Make it as nice and tight as possible but not excessively so for easier attaching to terminals later on.
With that done, you’re now ready to begin wiring. We’ll start with the plug first.
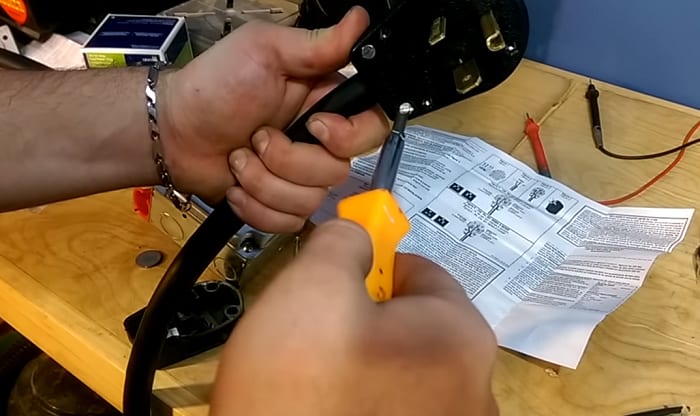
Step 3. Open the plug, then start attaching each wire to the right terminals
Not all plug heads are designed the same way. But it’s obvious that they’re made by manufacturers with internal markings to let you know how to wire them. Use this attribute to your advantage.
But before that, we need to open the plug head first. Grab the appropriate screwdriver, then unscrew all the screws found on the plug cover to remove it.
You can now start attaching the wires to the terminals, which are often connected to the prongs. Loosen the screws of every terminal, enough to accommodate the wires.
The plug should have color labels for the white (neutral), black (hot), and green (ground) wires.
- In an average three-prong plug, the black (hot) prong is often larger than the white one.
- I usually screw the black wire first, but it’s up to you which one you attach first. Feel free to take out the prongs for added ease.
Make sure there’s no exposed copper once you insert and screw each wire in place.
Once you’re done wiring, you can now put each prong back in its slots on the plug. White goes in the right slot, black in the left, and green in the middle.
Step 4. Secure the wires, then re-screw the plug’s cover
Some plugs may come with their own wire holders that you need to screw in place. Be sure you use them for added security and stability.
Now, replace the cover and all the screws you took out earlier, then re-screw them again. The RV extension cord cover may need to be positioned properly in order to latch on correctly.
With that out of the way, start tightening the screws until the cover’s firmly attached. Afterward, you can now grab the other end of the cable to make a 30 amp outlet for the RV.
Step 5. Open the outlet’s cover and the knockout for the wires
Use the screwdriver again to take out any screw that’s holding the outlet’s cover in place. In most cases, you just need to take out one, and then you also have to remove the knockout where you’ll be inserting the wires later on.
Normally, you’ll have to install the base of the strain relief clips first. You’ll see where you need to position it by using the screw holes often found on the raised edge of the outlet where the knockout is.
I suggest you slightly tighten each screw first, then position the strain relief clip’s base before firming the screws up all the way.
Step 6. Start wiring the outlet, then test your completed 30 amp extension cord
Insert the wires through the knockout’s opening, then start wiring them to the correct terminals. Similar to the plug, there should be labels to guide you through this.
When in doubt, you can use the finished plug as a reference. Position the plug in the same manner that you would insert it into an outlet. The plug’s prongs touching the outlet’s terminals show where you’re supposed to terminate the wires.
Unscrew the outlet terminals, then screw the wires in place, similar to how you did it on the plug head. Done? All you need to do now to complete your creation is attach the upper part of the strain relief clip.
Then, just screw it in place, making sure that there’s minimal to no movement on the cable once you’re finished.
Rescrew the outlet’s cover and test your completed cord with the suitable appliance or device you built it for.
Tips to Remember When Choosing and Using an Extension Cord
- Always use a cord only for its intended purpose, whether it’s designed for indoor or outdoor use.
- Choose only the cord with the correct wire gauge and length for your requirement (e.g. use only the correct size extension cord for the camper, which is 6 AWG for 50 amps, for instance).
- Never exceed the extension cord’s current rating, unless you want it to overheat.
- Keep extension cords from becoming wet as much as possible. This takes being consistently mindful of the conditions where you’ll be using it.
- Bear in mind that longer cords have lower current capacity than their shorter counterparts.
FAQs
What length extension cord should you use?
The golden rule is to keep it as short as possible, and if you need longer lengths, adjust the wire size.
One caveat, though: Some people like to connect 2 50 amp RV cords, and that’s practically inviting danger. Don’t do that, unless your aim is doing something futile like overloading and overheating them.
What kind of extension cord do I need for my travel trailer to run?
You’ll need to account for your RV’s power needs. If it’s 15A, then a cord with a 10 gauge wire will do. At 50A, you’ll need to upgrade to a 6 gauge wire.
What gauge extension cord do I need for a 30 amp RV?
30A may also work with a 10 gauge wire, similar to 15A, but longer runs will pair better with an 8 gauge wire.
Is it safe to use a 30 amp extension cord on an RV?
It’s entirely safe as long as you plug a load into it that will not exceed its current rating. Also, avoid plugging it to another extension cord to increase its coverage.
Conclusion
For many people who go ahead and learn how to make a 30 amp RV extension cord, it usually doesn’t take long for them to discover that it’s very useful. After all, there’s no shortage of scenarios where a 30 amp RV cable with the right length proves to be incredibly useful (if not necessary).
To sum up the steps to making an RV extension cord:
- Buy a three-prong plug, outlet, and the right wire size.
- Strip and attach the wires properly to the outlet and plug’s terminals.
- Test the extension cord.

I am Edwin Jones, in charge of designing content for Galvinpower. I aspire to use my experiences in marketing to create reliable and necessary information to help our readers. It has been fun to work with Andrew and apply his incredible knowledge to our content.