
Do you know that you can save time and money by learning how to troubleshoot your home’s electrical circuit? The good news is that you don’t have to be an electrician to do so.
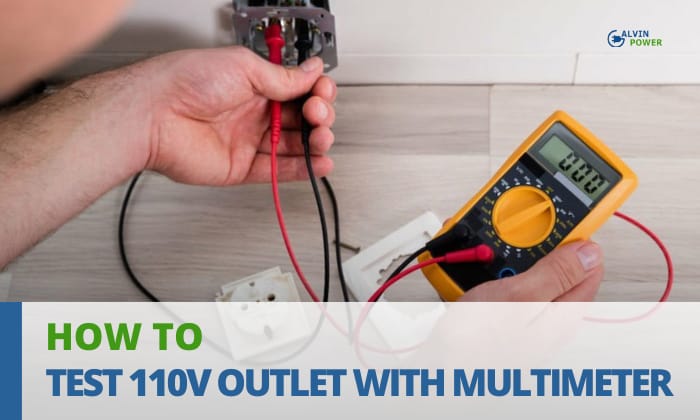
In this article, I will share straightforward steps on how to test 110V outlet with multimeter. So, by the end, you’ll have the knowledge and confidence to confirm if your electrical system is in good working condition.
Table of Contents
Ways to Test 110V Outlet With Multimeter
Before we dive into the procedure for testing your 110V outlets, it’s essential to grasp some fundamental concepts about electrical circuits. In this case, voltage represents the force that propels electrons through wires, while amperage signifies the actual flow of electrons within the circuit.
In this guide, we will test a live connection using a multimeter. It’s crucial to note that when working with live circuits, you must exercise extra care. If you’re not entirely confident in your abilities, I highly recommend seeking the assistance of a professional electrician.
Additionally, to check voltage at home, it’s advisable to start by connecting the black connector into the COM port and the red connector into the Ω or + port.
Now, let’s walk through the detailed steps for testing the voltage rating of a 110V circuit:
What to Prepare
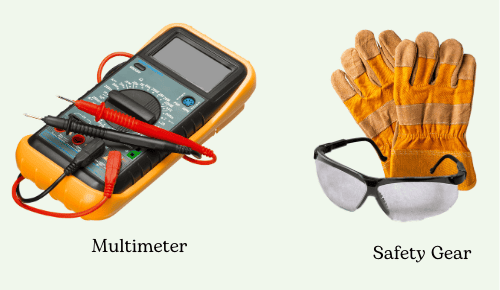
- Multimeter: You’ll need this device to test wall outlet AC voltage rating. Ensure it has an appropriate voltage range, typically higher than 110 volts, for accuracy.
- Safety Gear: Prioritize safety by wearing safety glasses and gloves to protect yourself during the testing process.
Test the Voltage Rating
1. Set the Multimeter
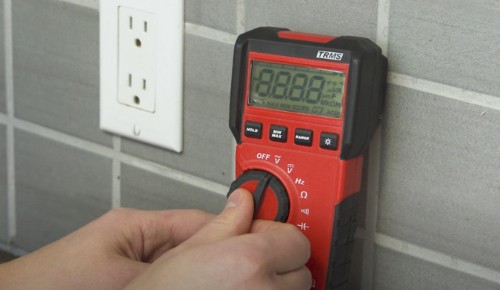
Begin by selecting the AC voltage setting on multimeter (to test outlet). This ensures it provides accurate readings.
It is also essential to recognize the hot, neutral, and ground connections within your electrical outlet. Here’s a quick guide:
- The hot connection is the smaller slot where you’ll place the hot probe of your meter.
- The neutral connection is the larger slot where you’ll connect the common probe.
- The ground connection typically appears as a U-shaped slot.
2. Test Every Electrical Connection
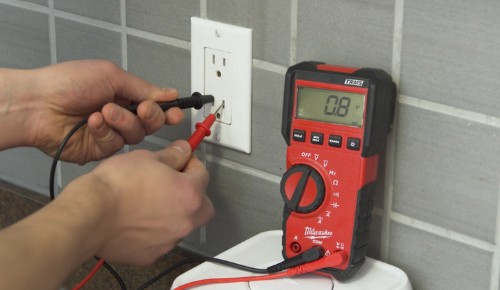
Now, let’s test if an outlet is bad by checking various terminal combinations: hot and neutral, hot and ground, and neutral and ground connections.
- For hot and neutral testing, connect the common probe to the neutral terminal of the outlet and the hot probe to the hot terminal. You should see 110 to 120V.
- Next, proceed to check the ground and hot connections by putting the black probe into the ground slot and the red probe into the hot connection. A successful measurement should read between 110V and 120V, indicating a good electrical connection.
- Additionally, test the neutral and ground connection (black probe to neutral, red probe to ground), which should yield no reading.
Note: If you encounter irregular readings with the outlet tester in any of these combinations, it signifies electrical connection problems, such as grounding issues. In such cases, it’s advisable to seek professional assistance for thorough troubleshooting and circuit repairs.
Test an Outlet for Continuity
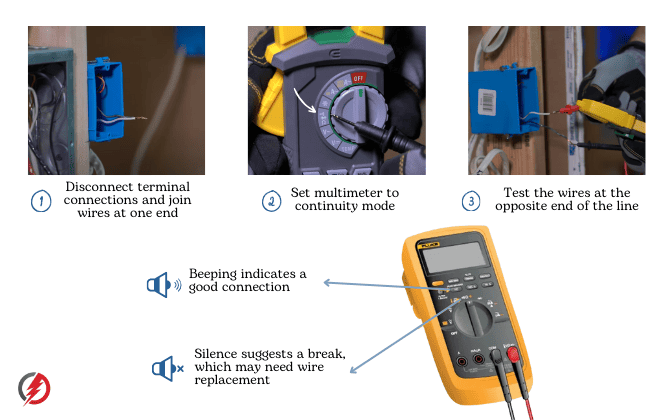
To perform a continuity test along the circuit line, you’ll need to disconnect the terminal connections at both the outlet and the panel breaker. Then, you’ll join the wires at one end of the circuit.
Now, set your multimeter setting to the continuity function (which has an audio wave symbol). Proceed to test the wires at the opposite end of the line. Typically, a functioning connection will produce an audible beeping sound on the multimeter.
Conversely, if your meter remains silent, it indicates a break in the line, which may necessitate wire replacement. This continuity test helps identify interruptions in the circuit, ensuring its proper functionality.
Test Outlet Amperage Rating
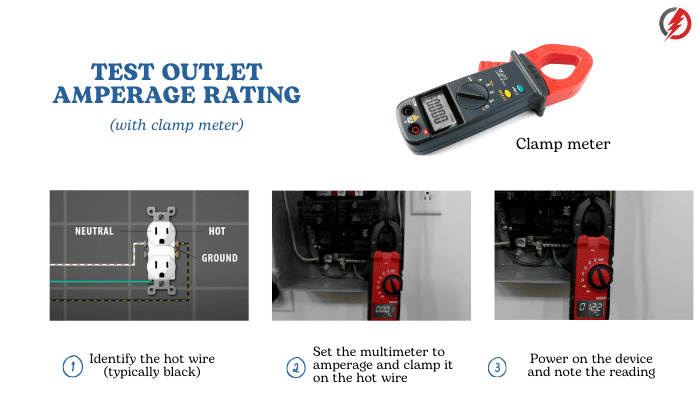
Another way to test an outlet is to check an outlet amp rating. However, for this task, you’ll require a specific type of multimeter known as a clamp meter. This device allows you to measure the actual current drawn by the circuit.
Furthermore, you’ll need an appliance that can be plugged into the outlet, and you’ll test the circuit via the panel box.
- First, identify the hot wire, typically the black wire connected to the circuit breaker.
- Then, using your multimeter testing wires, set the multimeter to the amperage setting and clamp it onto the hot wire.
- With the device plugged into the outlet, power it on and observe the reading on the meter.
Conclusion
Knowing how to test 110V outlet with multimeter will give you an idea of how efficient and safe your electrical outlet is. By following the various tips to test your outlet, you will know when to call a professional to conduct repairs.
It’s essential to approach electrical work with the utmost caution and awareness of potential hazards. If you encounter irregular readings or any uncertainties during testing, don’t hesitate to seek the expertise of a professional electrician.
Prioritizing safety ensures not only the well-being of your electrical system but also your peace of mind.

I am Andrew Wright. With 8 years of experience designing, installing, and maintaining electrical power systems. I love my job, and I have always wanted to offer others the necessary help so they can take care of their houses.